

Deploy a REST API using Serverless, Express and Node.js - Part 1
Simple Introduction to Serverless


What is Serverless ?
Serverless is a framework which allows to setup and run web applications with ease. Serverless can be used to connect to various cloud providers and use the service of the clouds to run our app. The benefits are a lot like lightning-fast deployments, automatic scaling, and pay-per-execution pricing.
What will we be building at the end of the series ?
Let's create and deploy a simple CRUD REST API using serverless with Nodejs and Express. We will be using AWS as our cloud provider and the services below from AWS
- Lambda
- Dynamo DB
- API Gateway
- S3 Storage
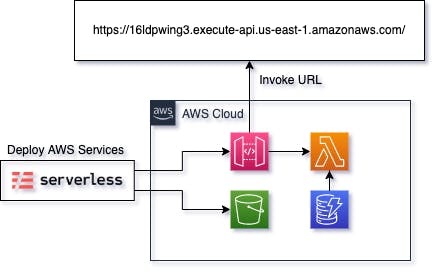
So basically we will have serverless package to deploy all of our services in AWS cloud, when the deploy happens it creates an S3 bucket where it stores the code of the lambda. We will use the lambda to handle the requests coming from the API gateway. The amazing part about this is that, we don't have to do anything in the AWS management console. For practice, we will tell the serverless to create a dynamodb table and we will use that in our CRUD REST API.
What will the API Look like ?
We will develop a basic REST API to store and manage users.
- GET - /users - Retrieve All Users
- POST - /users - Create a User and store in DB
- GET - /users/:userId - Retrieve a single user data
- PUT - /users/:userId - Update a single user data
- DELETE - /users/:userId - Delete a single user data
Setting Up Serverless
Now that we know what we are going to build let's set up our project.
Prerequisites
There are a few prerequisites that we need to have before we go into development.
1. Setup your AWS account
If you do not have one, then sign up right here for the account, it's pretty straightforward. If you are new to AWS then please go through some basics of AWS before reading.
Once you have setup and have a good understanding of AWS services, please generate and keep your access key and secret key handy with you.
2. Setup Node Js in your machine
If you have not setup nodejs, please set it up here
3. Create a serverless account
This step is not mandatory, but i prefer it because this gives us a good glimpse of our app in a dashboard format and we can see it in a cleaner UI. We also can view it in a console, but will talk about it later.
Once we are done with the prerequisites, we can move ahead to the next section.
Setup Development Environment
Firstly, we need to install serverless CLI globally using NPM,
npm install -g serverless
To know more about serverless follow this link
Optional Step
serverless loginthe command prompt or terminal would navigate to your selected browser and you can use that to login. Once you login, go into the dashboard and initially you may not see any apps there.
Let's navigate to the org in the side nav bar. Inside org we see many tabs, select the provider tab and add a new AWS provider and add in the access and secret keys there. Once done, serverless will use those credentials to deploy our services in AWS.
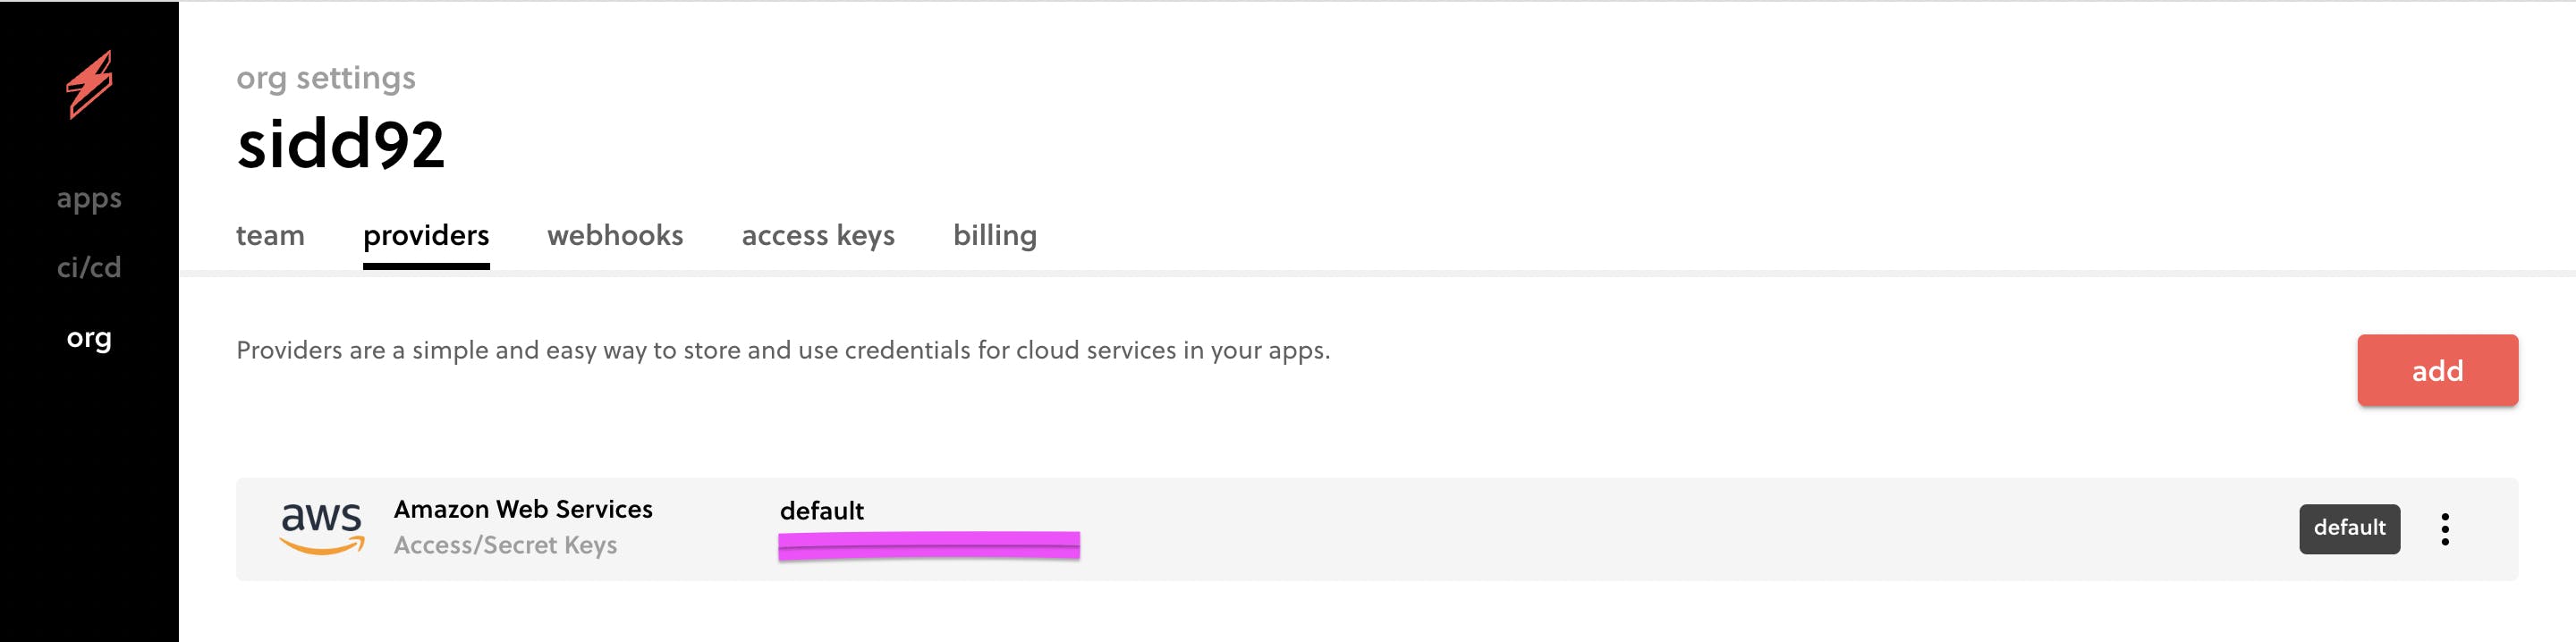
we can see that default is the name of the profile it would store those keys in. You can know more about providers here.
Now once we are done with the installation, let's create a folder in our desktop or any other location you prefer to store our project. Navigate inside your project folder, open up the Terminal or Command Prompt and type :
serverless
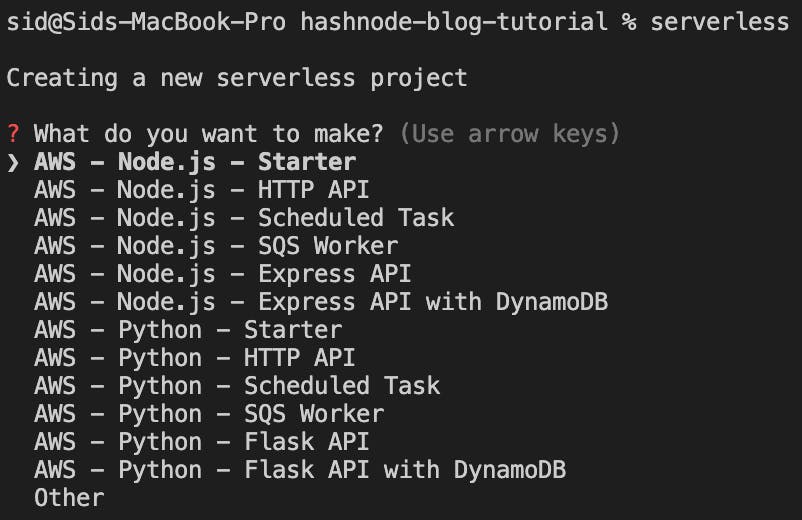
You would get these options to setup your project using a base template, for our needs lets select AWS - Node.js - Express API we will add the dynamo DB details manually into the serverless.yml file later.
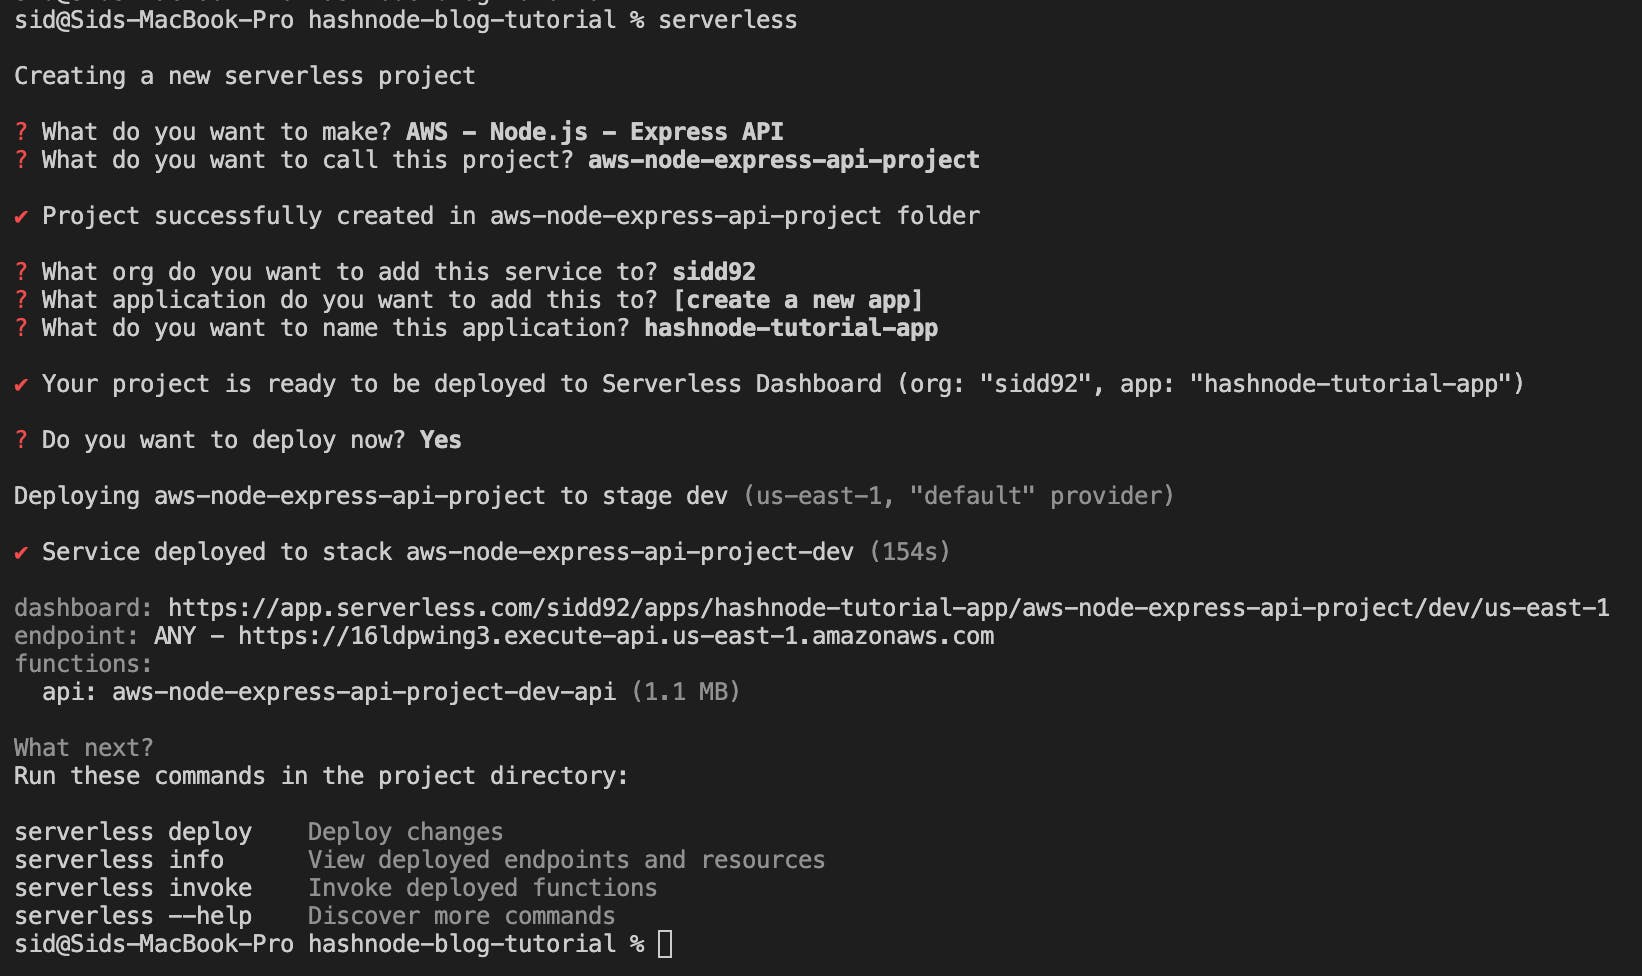
You can go ahead with the default settings for the others, you can refer the above image for details about what project settings I have put in.
Once you are done with the settings it takes a while for the cloudformation images to setup, once setup you would get a directory like below:
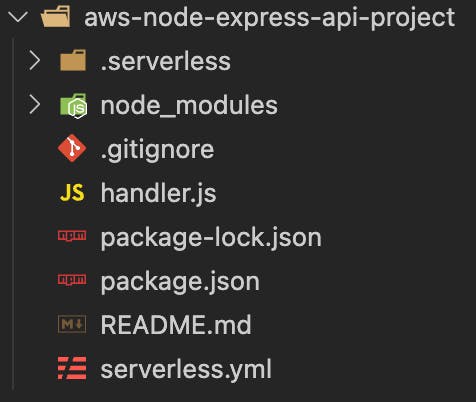
Now just run to deploy the services on to the AWS cloud.
serverless deploy
In this post I will focus on the serverless.yml file. As this is the main file that generates your AWS architecture. We can define Roles, Services, Functions and many more things we need. To read more about the serverless.yml file , navigate to this link.
What is Inside the serverless.yml file ?
Let's explore what is inside the serverless.yml file.
org: [YOUR ORGANIZATION]
app: hashnode-tutorial-app
service: aws-node-express-api-project
frameworkVersion: '3'

provider:
  name: aws
  runtime: nodejs14.x

functions:
  api:
    handler: handler.handler
    events:
      - httpApi: '*'
We can see three sections for now,
Section 1 - Top 4 details
- org - Basically an organization name, used for console and dashboard to know the user under which the project is created.
- app - The app name that will be displayed in dashboard, we can create multiple apps within the same org, so in order to differentiate them we could use the app.
- service - name of the service by default same as the folder name
- frameworkVersion - serverless version
Section 2 - provider
- name - name of the provider(AWS, Azure, GCP etc..)
- runtime - runtime of the lambda, could be NodeJS, Python, Java etc.
Section 3 - functions
- api - where all the details about the lambda function
- handler - name of the function that will handle the request -[name of the file].[name of the function]
- events - are objects, which can contain event-specific information. The events property is an array, because it's possible for functions to be triggered by multiple events.
httpApi - In our
serverless.ymlfile we have one event named ashttpApi. If we see our deployed state in the AWS console, we can see a API gateway that would be created with a Request type of ANY on the lambda function. To know more about thesehttpApievents navigate to this link.
Now that we know what the serverless.yml file contains, we can go ahead with the next file handler.js. Based on the template we had selected earlier, serverless provides a basic file like the following:
const serverless = require("serverless-http");
const express = require("express");
const app = express();

app.get("/", (req, res, next) => {
  return res.status(200).json({
    message: "Hello from root!",
  });
});

app.get("/hello", (req, res, next) => {
  return res.status(200).json({
    message: "Hello from path!",
  });
});

app.use((req, res, next) => {
  return res.status(404).json({
    error: "Not Found",
  });
});

module.exports.handler = serverless(app);
the handler file has a very basic endpoints created using Express. We can see that the template gave us 2 endpoints, basic GET / and GET /hello. We can create multiple endpoints to suit our needs.
What does the deployed REST API look like ?
Now initially when we had setup our serverless in a project folder, we had a few links in the Terminal or Command Prompt. Like:

Let's checkout the URL and see what we get. After that we can see the AWS management console and explore the resources created during the deployment.
- Click on the dashboard link - you will be asked to login and then you can see a dashboard view like below:
if you have not done the optional section as above you may not get the dashboard link
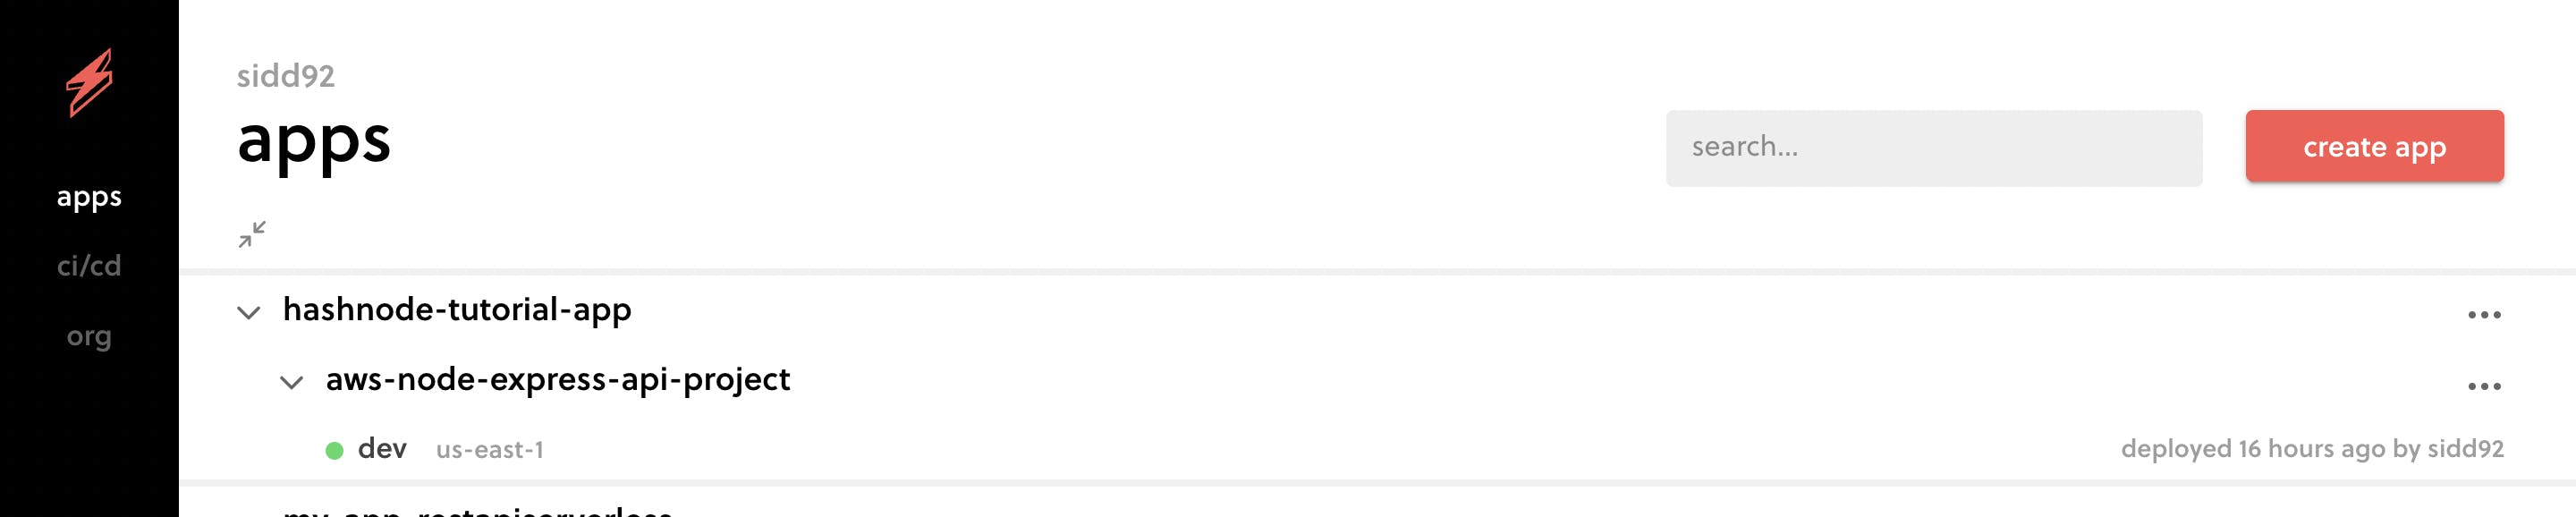
In the image, we can see our app name and the service name, then we can see the region in which it has been deployed to. If we need to set a different region for our resources we can do it from the serverless.yml file and tell it to deploy AWS resources in a different region. The default region is N.Virginia(us-east-1).
- Click on the Endpoint link to see the GET response in the browser.

- Functions - tells you what is the type of event it is handling and the name of the lambda in AWS
For us it is functions - api : aws-node-express-api-project-dev-api (1.1 MB)
Now that we have setup our basic app from a template, we are good to go for creating the API's. But that's for Part 2.
Conclusion
In conclusion, we have learned about the advantages of serverless and its power to create resources in AWS. There is a lot more to discover and soon we will cover those in the next part.