Employee Viewer API - Node, Express, Mongo - Part 2
create, read, update or delete employees using this API
This is Part 2 of the series, you can navigate to Part 1 as this will contain basics of what I am going to build.
Introduction
Thank you for so much views and likes for my Part 1 of the series 👍.
Previously, we saw about the setup of the basics of the REST API. We also created a very basic boilerplate code and added a GET route which returns a very simple message. We also saw about how we are going to structure the models and the routes using diagrams. We will be continuing that in this post.
Table Of Contents
Setup of the REST API✔️- Adding Routes and Adding Models - ( You are here 🚩 )
- Configure and Adding Images for Profile Pic
- Adding Controllers
- Testing using Postman
- Deploying REST API
Connect express app to Mongo DB
In order for our models and routes to work properly we will add a connection url to connect to mongo db. We will be using the cloud version on mongo DB, the Mongo Atlas.
Navigate to this link to login or sign up your account. Once you click the link you will be redirected to a website like below:
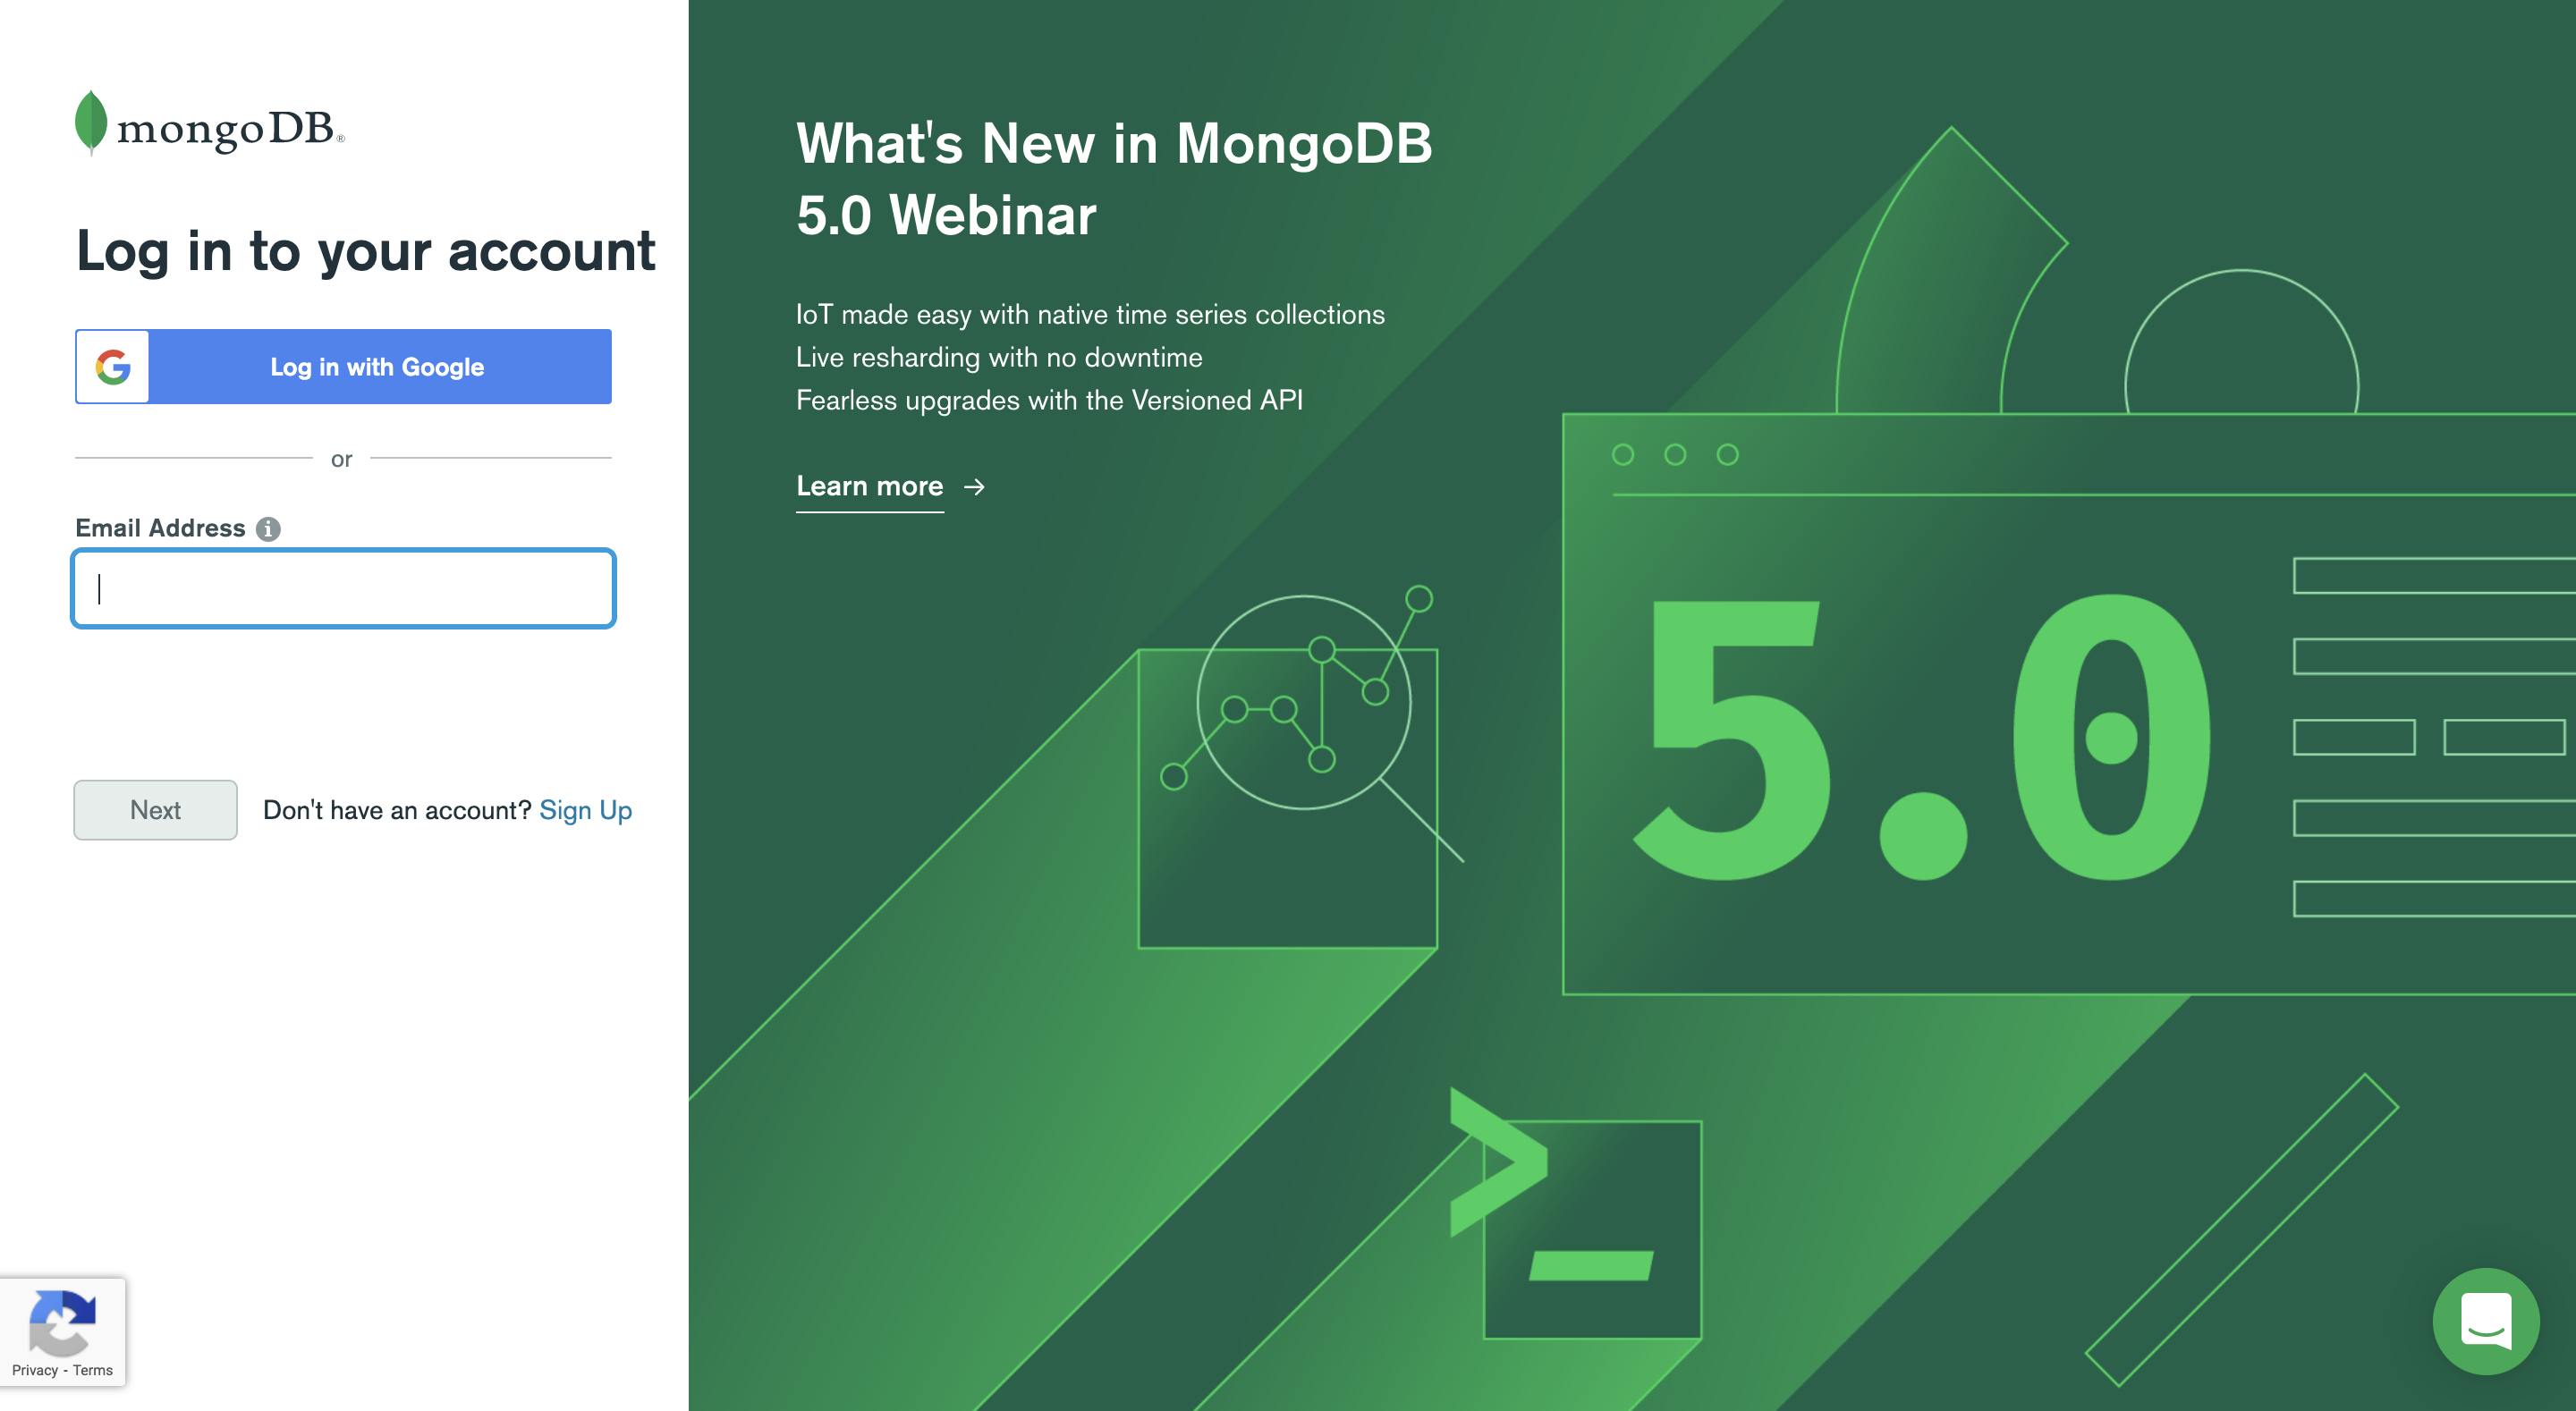
You can sign up for an account if you are a new user, the onboarding process is pretty straight-forward. If you are already a user, you can login using your credentials.
Once you are in, You need to create an organization first, this is basically your overall company name, you can name it anything you want. Inside each organization you are allowed to create 5 projects. Each project will have a database/cluster associated with it. You have an option for only 1 free cluster/database per project.
Now let's create a new database, I will choose the options like below:
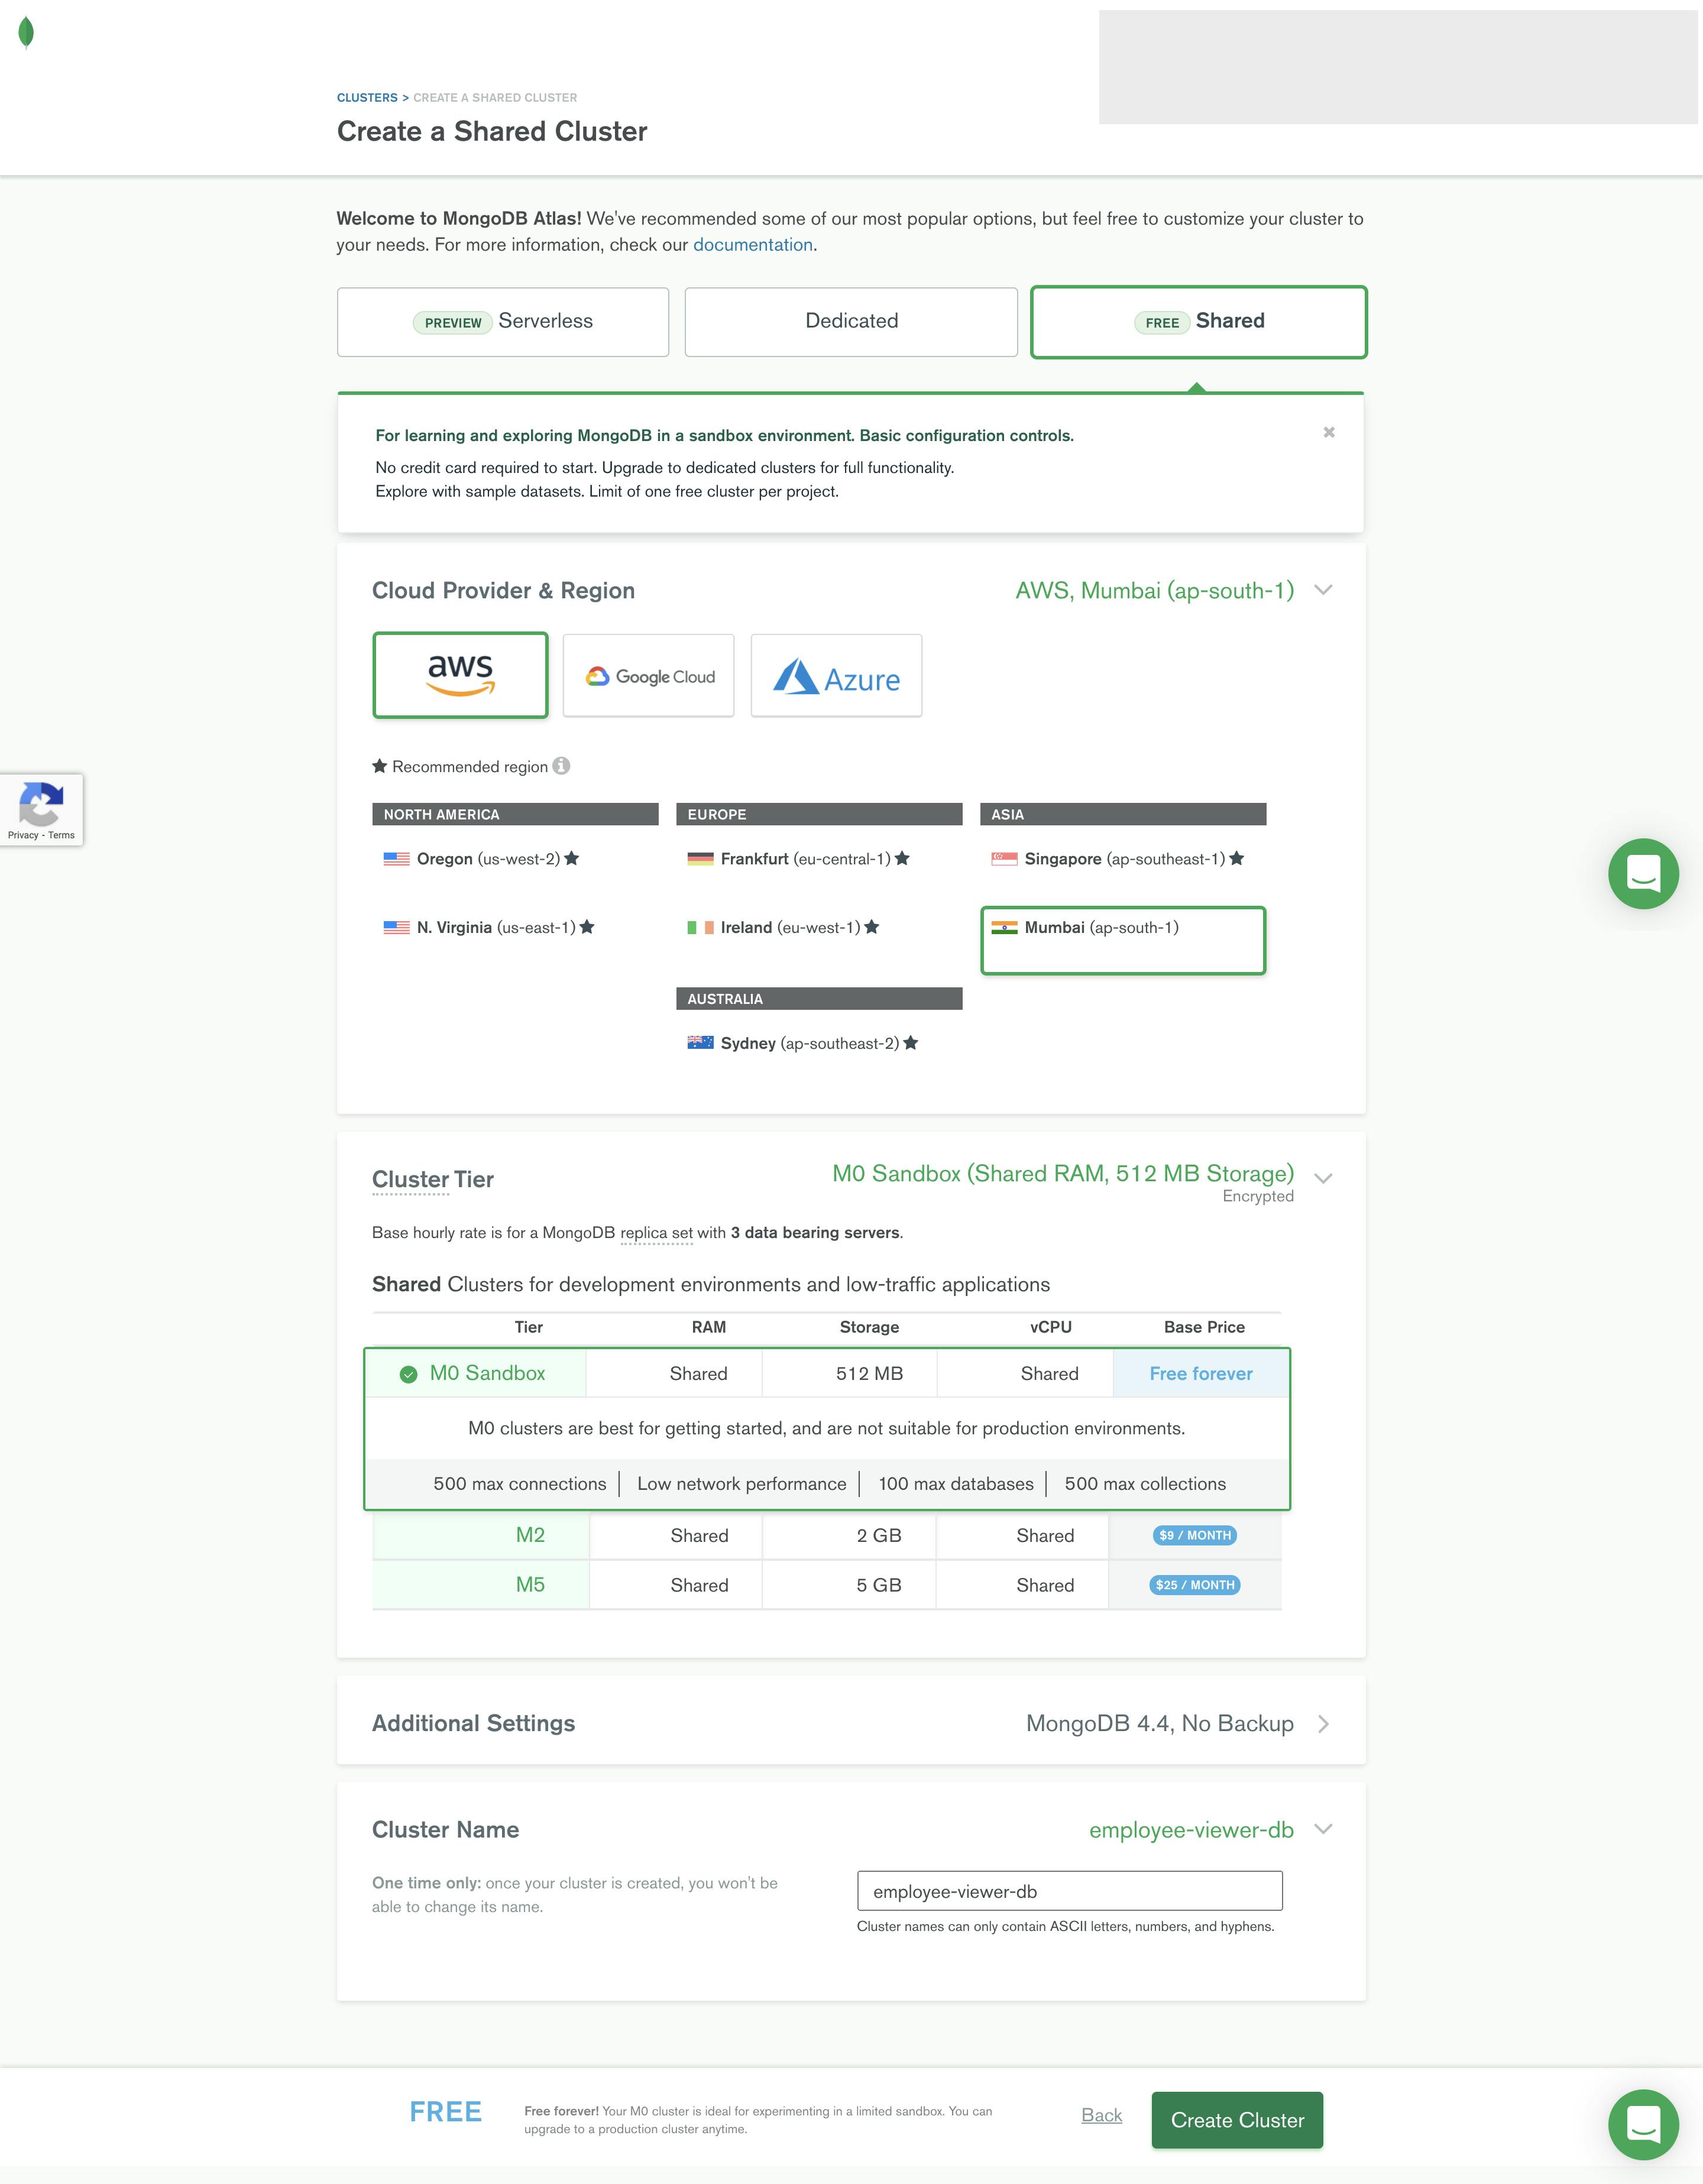
Note that you need to select
Free Foreveroption so that you don't pay.
I am choosing a shared cluster because this is just a api for learning and not for production. You can click on Create Cluster if you are happy with the options selected.
It will navigate to the cluster dashboard, where it will create the cluster and all other settings. You need to wait for a while until the cluster is setup.
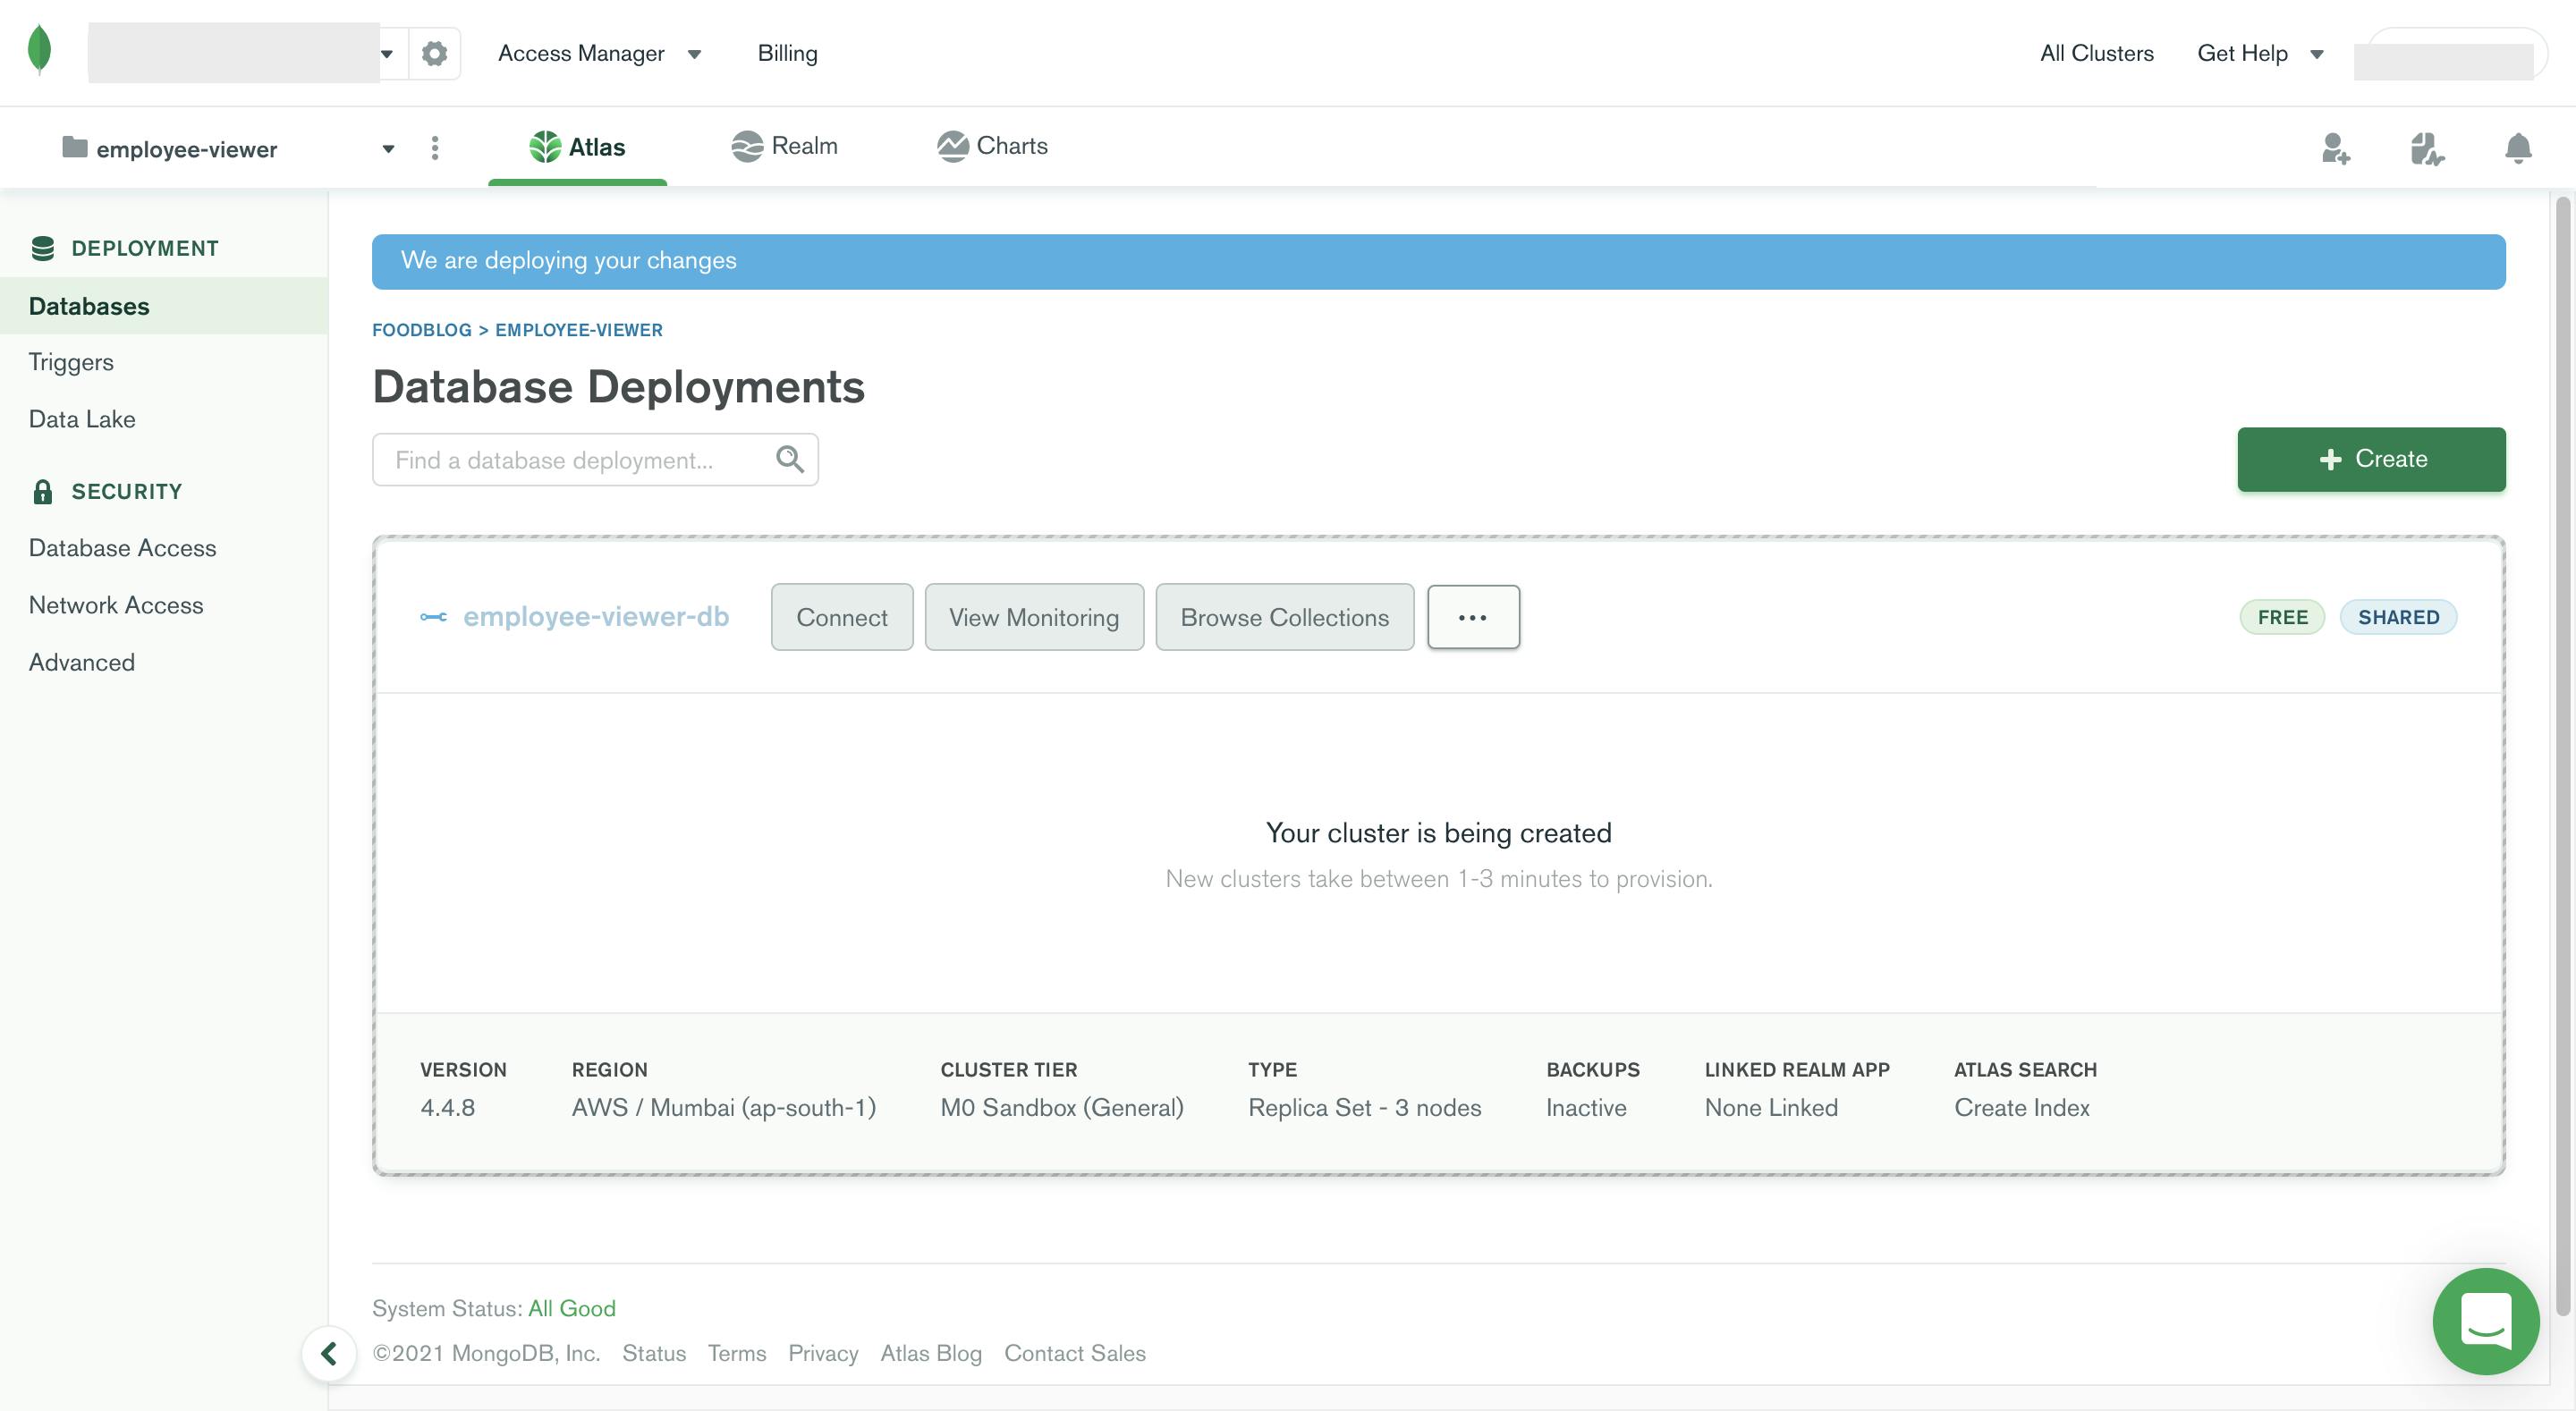
Once your cluster is setup it will look like below:
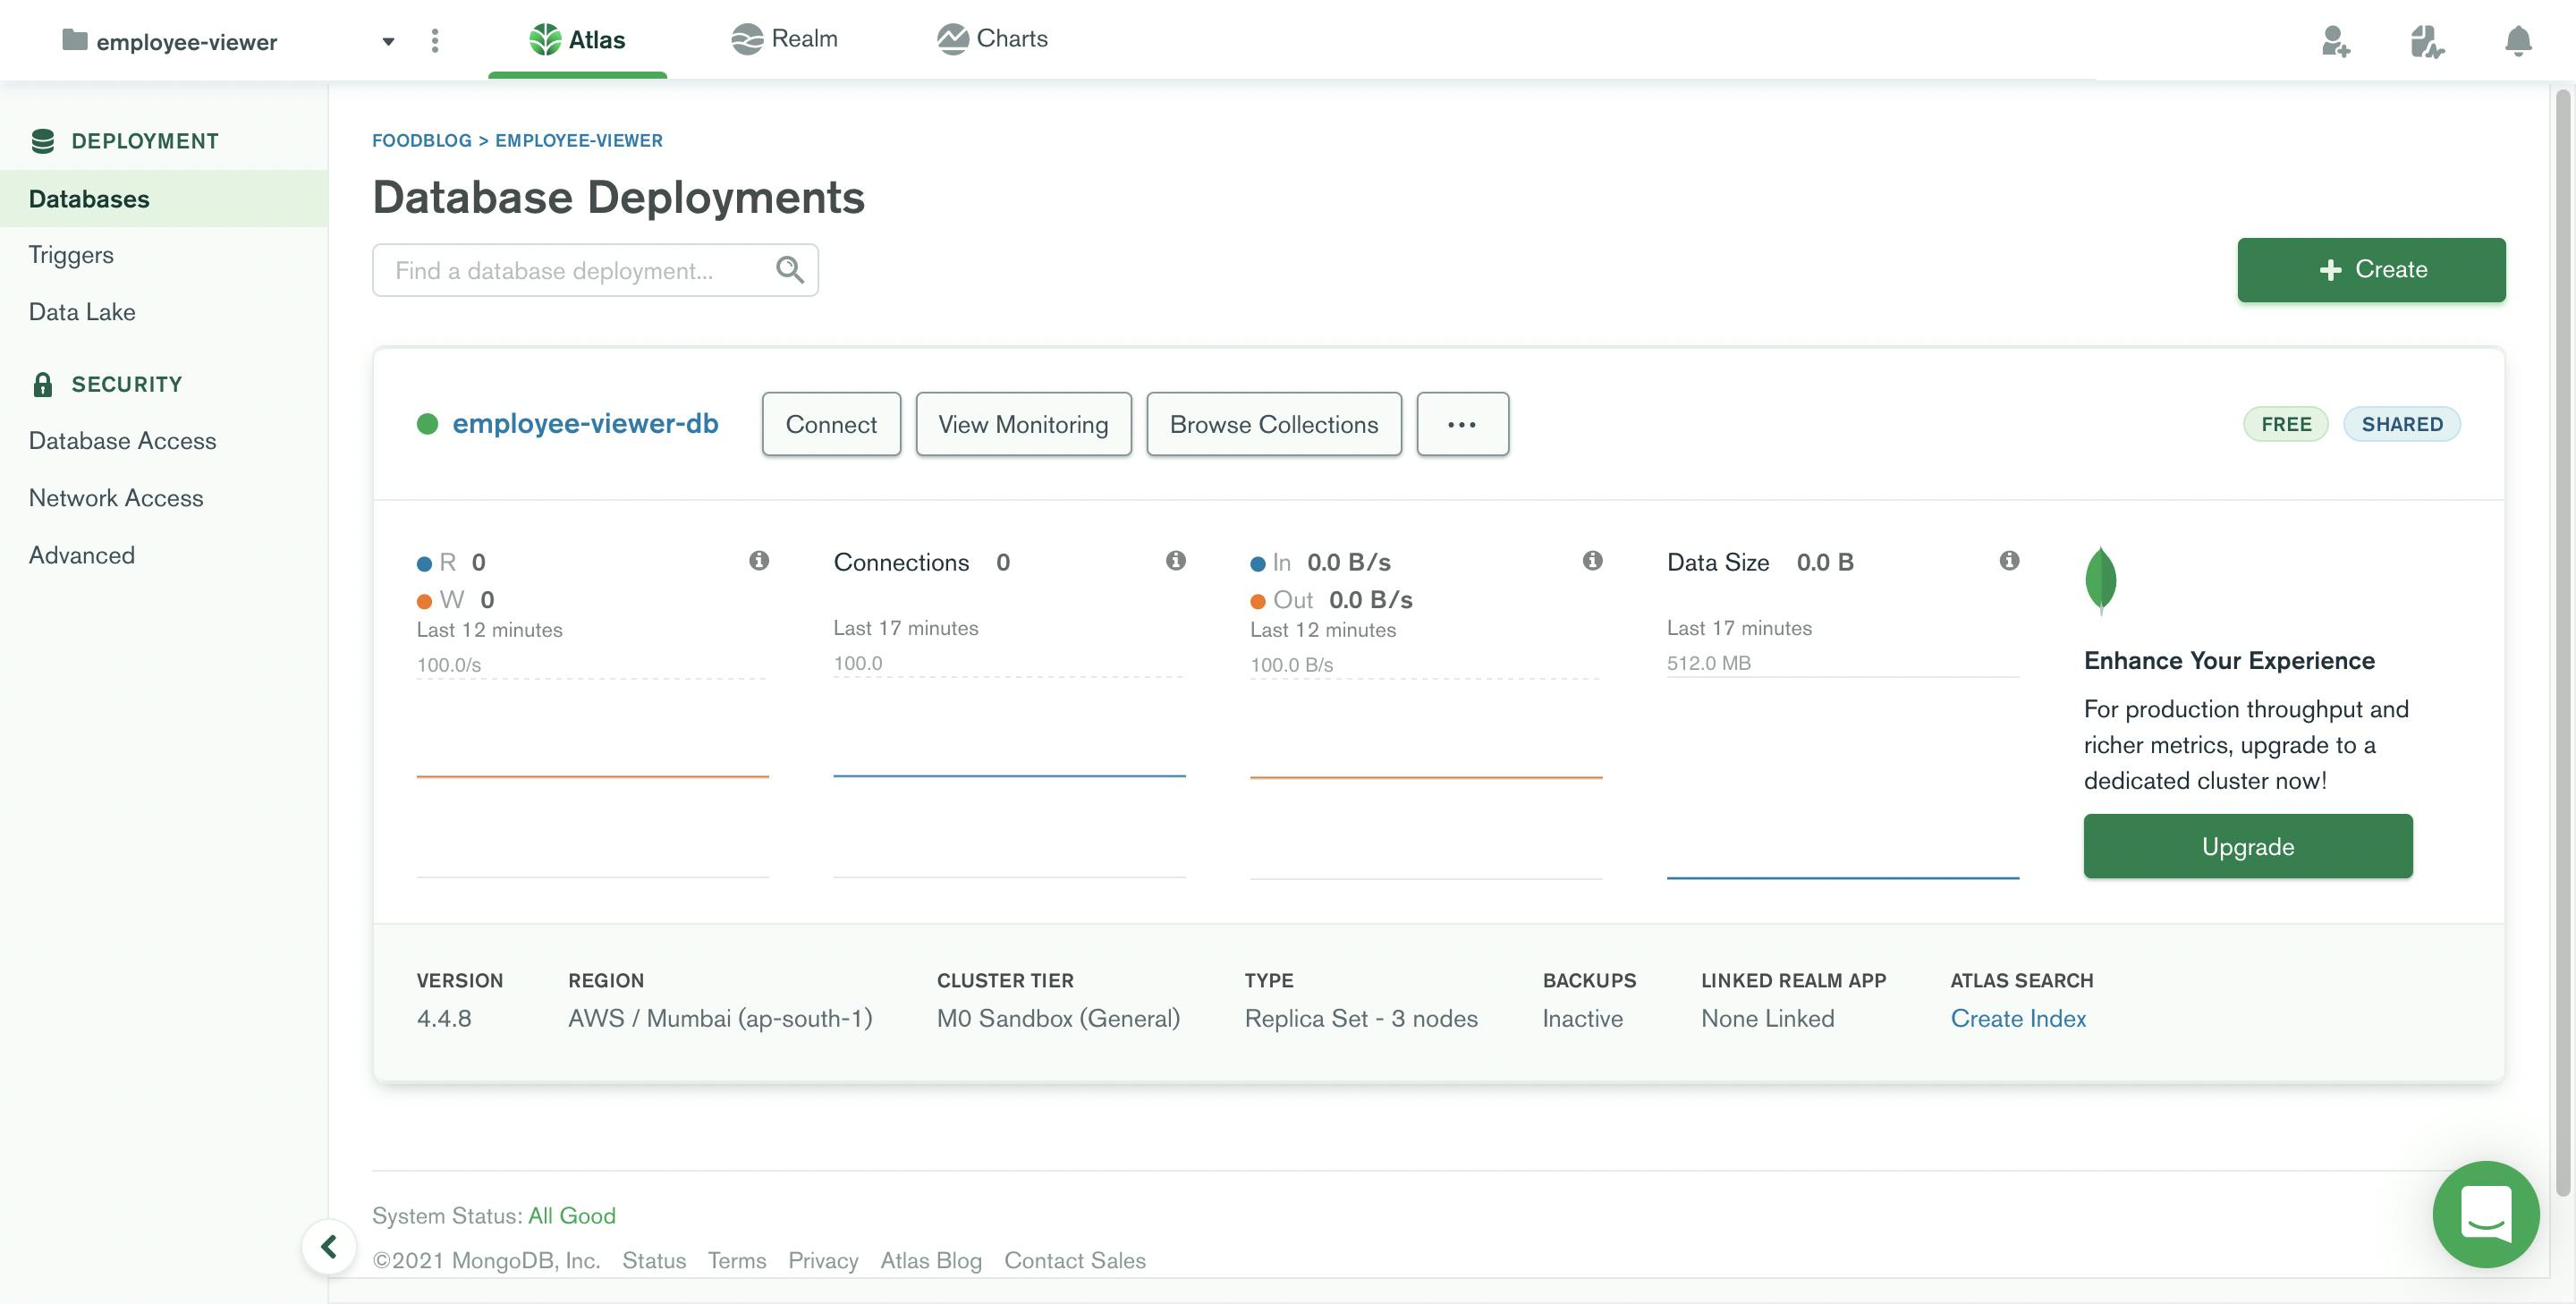
Before we can connect to our DB, we need to setup two things:
- Database Access
- Network Access
Database Access
Navigate to the Database Access in the side menu. This is to add the user to access the Database. You can assign users with different roles. We will be adding 1 user as an admin.
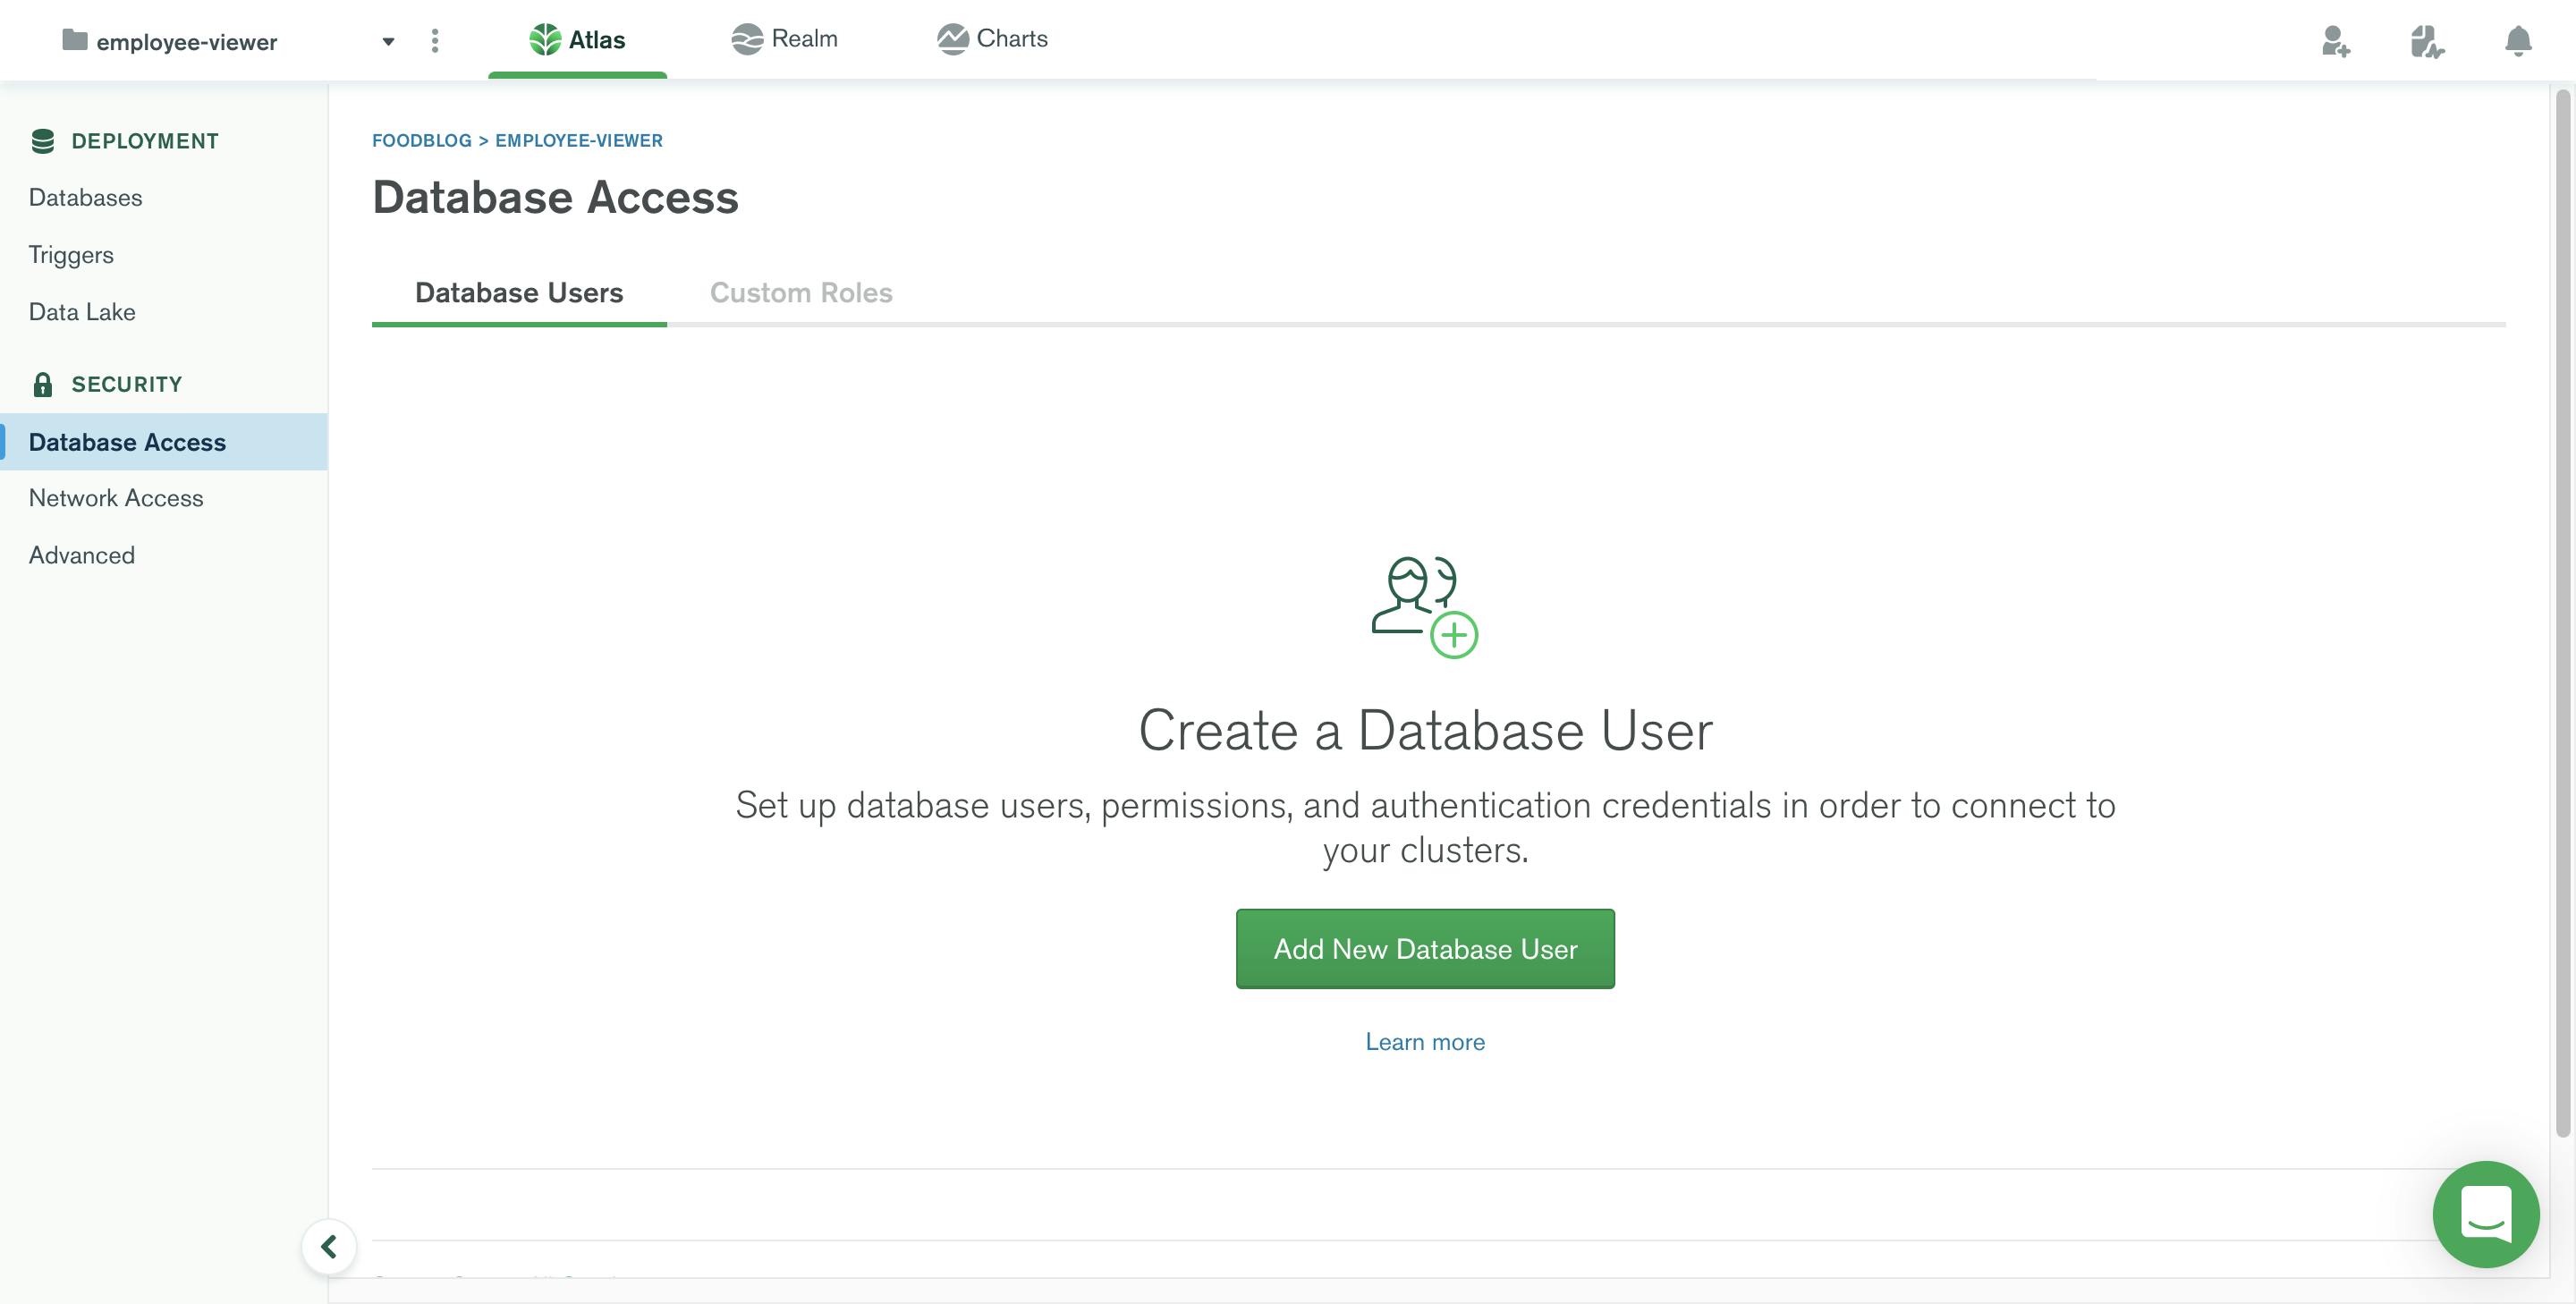
Click on Add New Database User. A modal will open like below
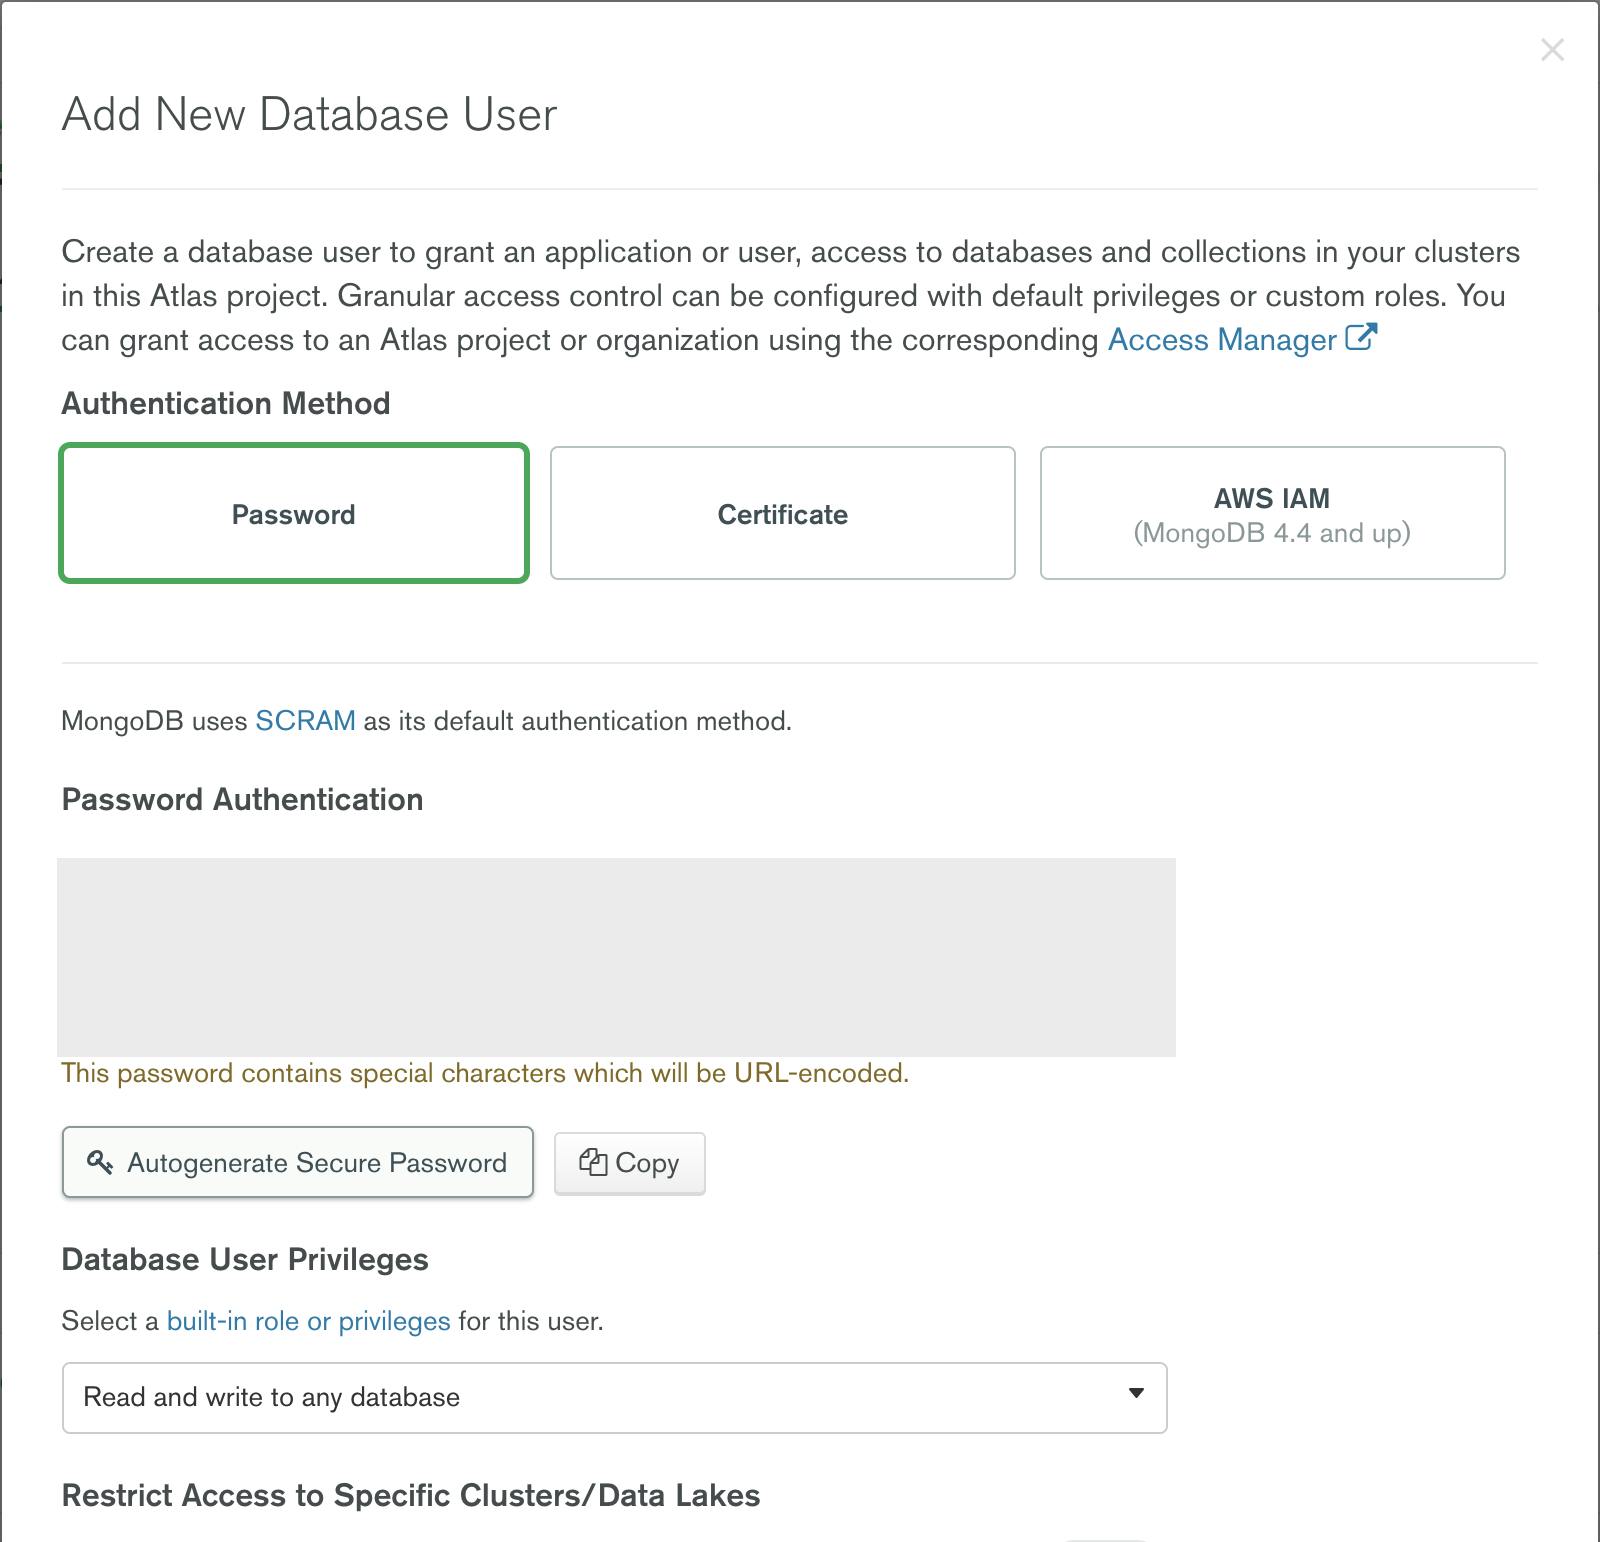
You can keep the Authentication method as password as I am going to use the Password option. You can experiment with other Authentication methods if you are interested.
In the Password Authentication section add your username and password or you can also auto-generate the password if needed. Take a note of your username and password. This will be needed when we connect the API with mongo atlas.
Next in Database User Privileges make sure you select the Read and Write to any database from the dropdown. There are also other built-in roles and even more specific advanced roles.
Once you are done with credentials, Click Add User. The Cluster will make the changes which will take a while. Now when its setting the new changes let us also add some network access as well. We need Network access when we need to connect to the Atlas from any server we have.
Network Access
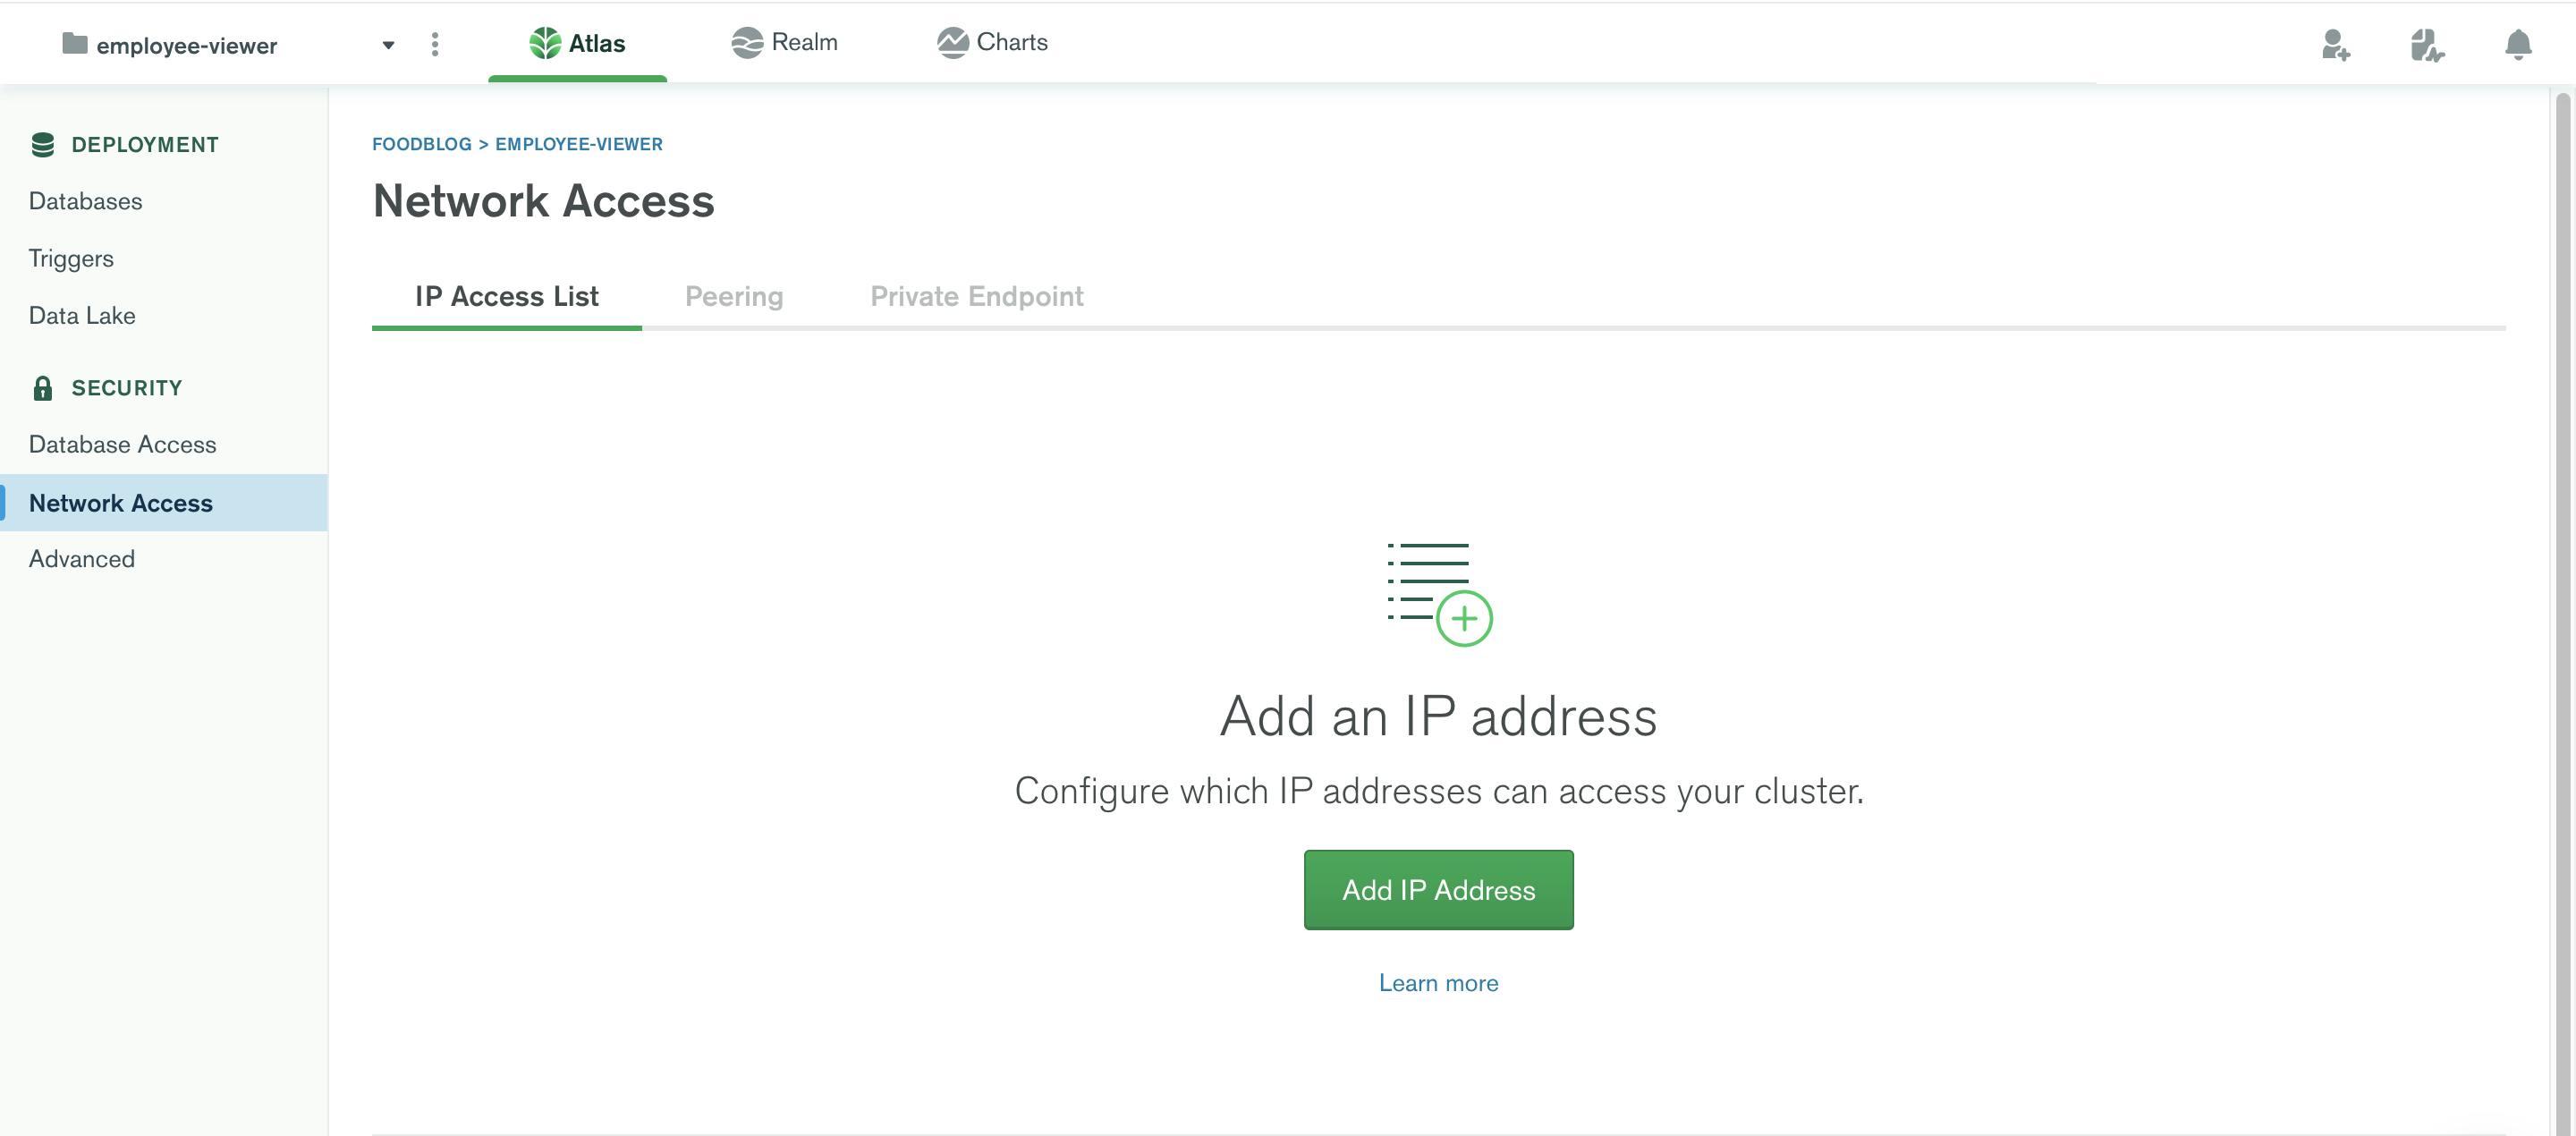
Navigate to Network Access from the side menu, Click on Add IP Address
In the below modal, you can see 2 buttons
- Add Current IP address
- Allow Access From Anywhere
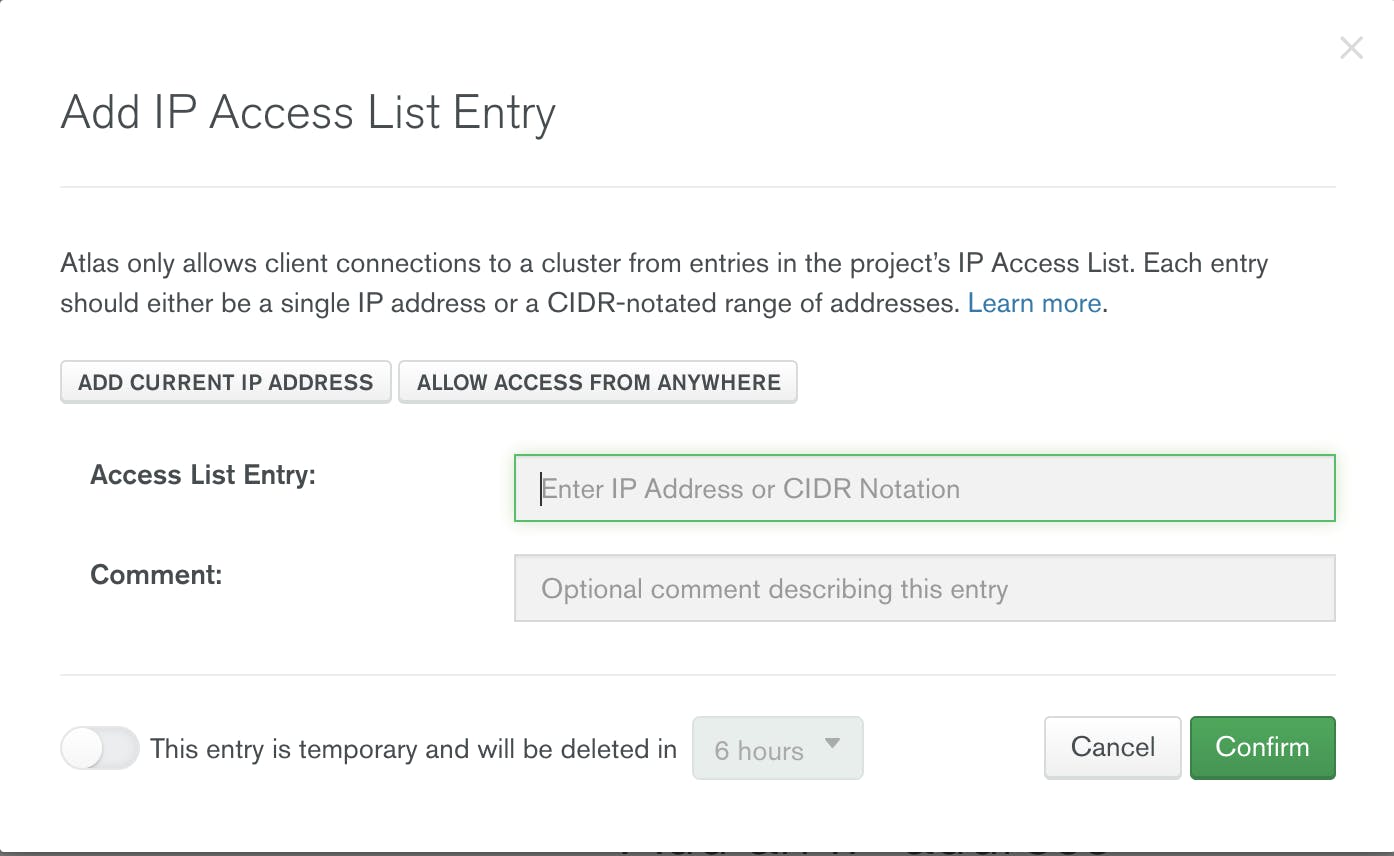
For this tutorial I am going to Allow Access From Anywhere. Once you are done with that you can click on Confirm and it will apply the changes to the Cluster. While we wait let's make some changes to our folder structure.
Folder structure setup
I want to change my folder structure a bit before proceeding to creating routes. Folder structure becomes really important even though your app may not be big right now, but later on you may add features and you have to waste time then to reshuffle files in and out of folders. So it's always wise to keep a fixed folder structure and let your team know about what structure needs to be followed.
Below is the folder structure I want to keep:
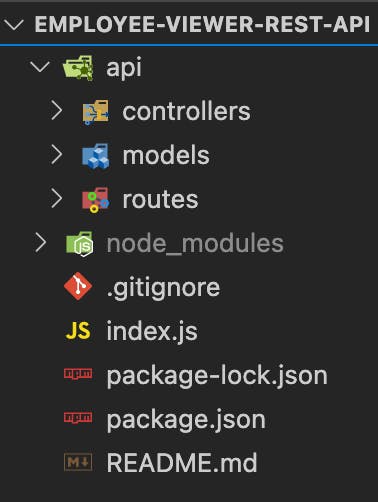
You can keep the above folder structure if you or you can follow your own folder structure that is comfortable to you.
Lets create a folder named api in the root of the folder. Inside api we will have 3 folders:
- controllers
- models
- routes
We will also add .env file to access our mongo url we may need later. In your root of the folder create a file named .env. We will add values inside this file later.
🚨🚨🚨 Do not commit the .env file in your version control, this is strictly to be only for server side and never to be shared to public 🚨🚨🚨
Connecting MongoDB with Express
Now that our Mongo Atlas is ready we can connect it to our app. Go to your Mongo Atlas dashboard like below

Click on the Connect button, a modal will open like below
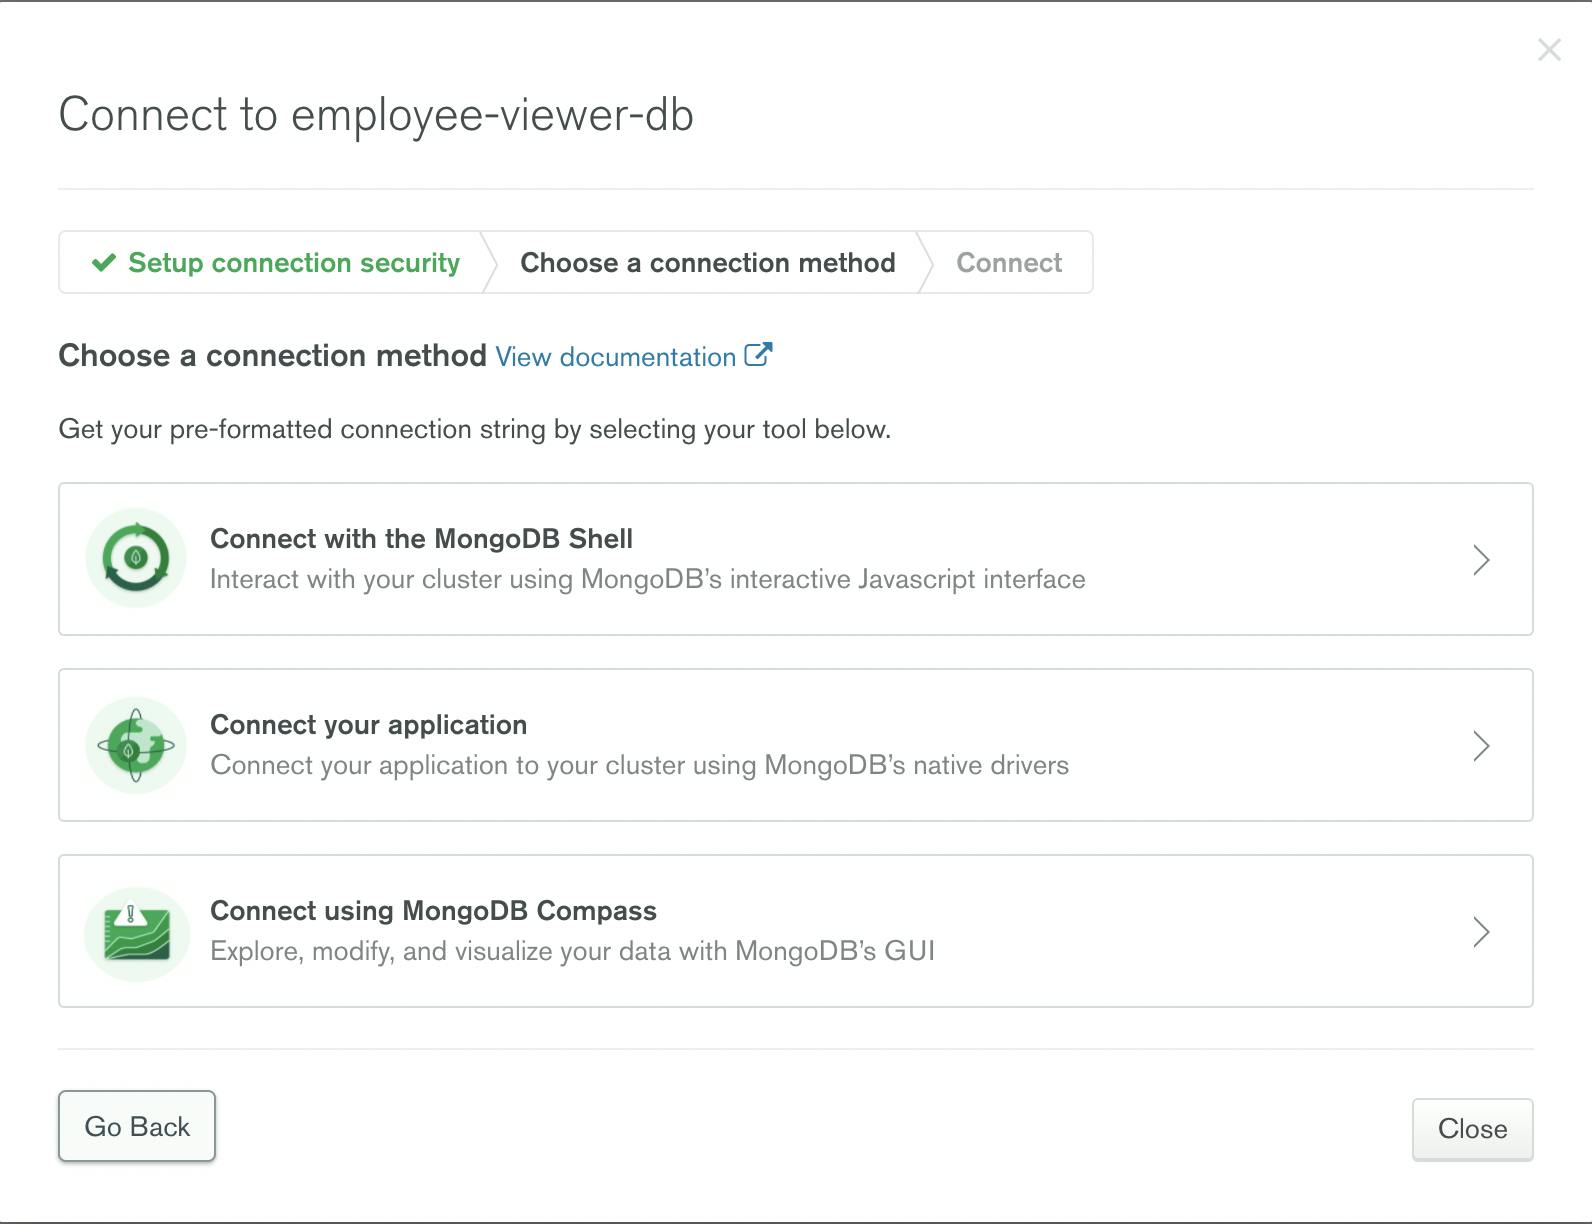
Select Connect you application method as this will provide us with the mongo url that we can directly use with the mongoose library we installed in Part 1.
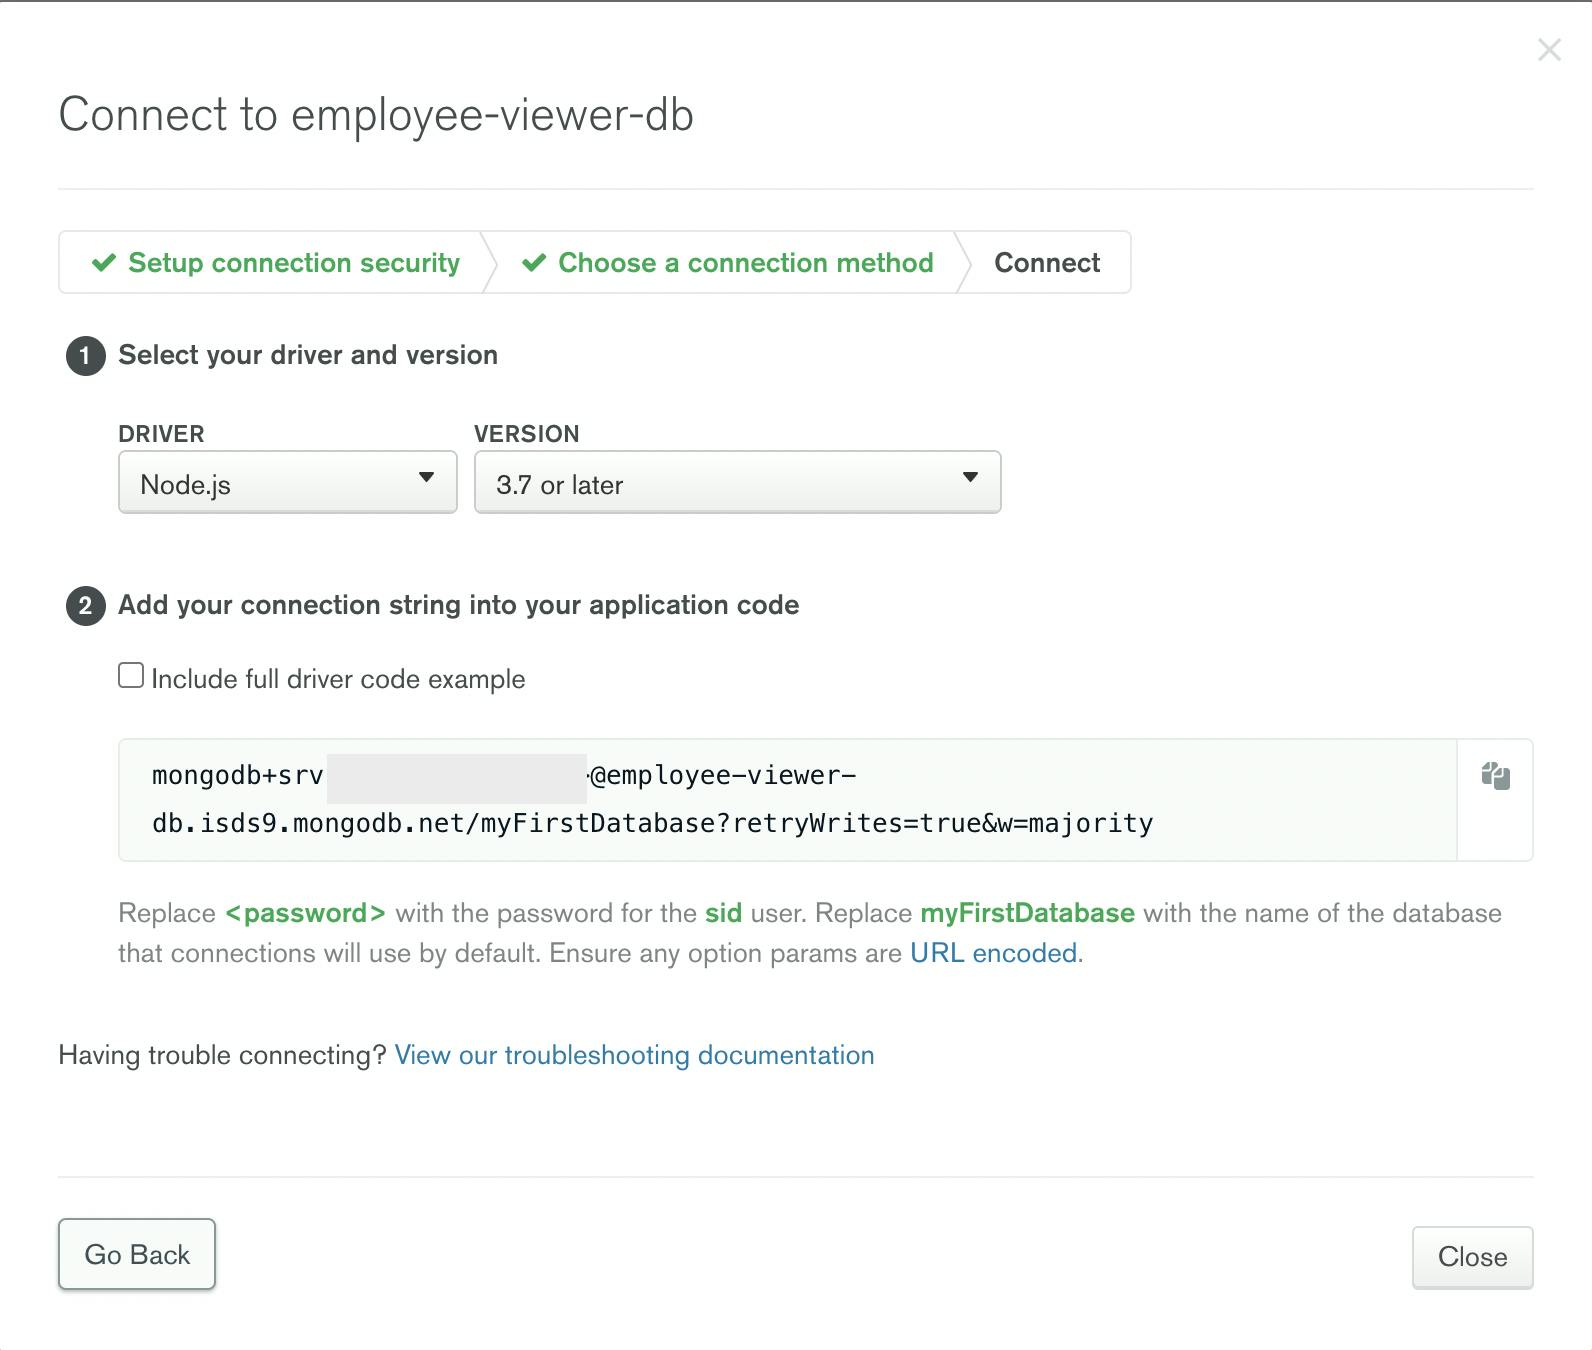
Copy that url and paste it inside the .env file we made earlier. Like
MONGO_URL=mongodb+srv://<username>:<password>@employee-viewer-db.isds9.mongodb.net/<dbname>?retryWrites=true&w=majority
Add your username, password and the dbname you wish to keep. I will use my dbname as test.
In order to use the .env values in our app globally we need to install a package named dotenv from the npm repository.
if your server is running, stop and run the following
npm install dotenv
Configure index.js to use the env variables
Open your index.js add the following to top of the file above everything.
require('dotenv').config()
Now that you have added this line you can use the process.env.MONGO_URL to connect to the mongo db.
Connecting to Mongo DB
Open index.js and first we need to import the mongoose package. We will use the connect function and pass it our MONGO_URL variable we set it in the .env file.
require("dotenv").config();
const express = require("express");
const cors = require("cors");
const morgan = require("morgan");
const mongoose = require("mongoose");
const app = express();

mongoose.connect(
  `${process.env.MONGO_URL}`,
  {
    useNewUrlParser: true,
    useUnifiedTopology: true,
  },
  function (err, client) {
    if (err) {
      console.log(err);
    }
    console.log("connected!!!");
  }
);

app.use(cors());
app.use(morgan("dev"));
app.use(express.json());

app.get("/", (req, res) => {
  res.status(200).json({
    message: "API is Working",
  });
});

app.listen(9000, () => {
  console.log("Express App Running http://localhost:9000");
});
Once you run the above file, you will see an output like this,

Adding Models
Before we move to creating routes we first need to configure models. As I illustrated in the previous article about our Employee Model. You can go to Part 1 to see the information regarding the model.
Create a file named employee.js inside the models folder.
employee.js
const mongoose = require("mongoose");
const skills = new mongoose.Schema({ name: "string" });
const employeeSchema = mongoose.Schema({
  _id: mongoose.Schema.Types.ObjectId,
  name: { type: String, required: true },
  age: { type: Number, required: true },
  profile_pic: { type: String, default: null },
  designation: { type: String, default: "-" },
  organization: { type: String, default: "-" },
  date_of_join: { type: String, default: new Date().toDateString() },
  experience: { type: String, default: "-" },
  skills: [skills],
});

module.exports = mongoose.model("Employee", employeeSchema);
Now let's create our first route and try to create an employee.
Adding Routes
We saw in the Part 1 that we have the following routes we need to add.
API Endpoints
We will need to create,read,update and delete information about the employees. We also need to add the authentication where only authenticated employees can edit, delete and create. We will get to authentication later.
GET Requests - Public Visibility
- GET - All Employees - /all
- GET - Single Employee(by ID) - /all/:id
POST Requests
- POST - Create Single Employee - Private Visibility - /create
PUT Requests - Private Visibility
- PUT - Edit Single Employee(by ID) - /edit/:id
DELETE Requests - Private Visibility
- DELETE - Delete Single Employee(by ID) - /delete/:id
For now we just need to add 1 file inside the routes folder. We will add employee.js inside the routes folder.
Let's add the code we need for the employee.js
/* Handle Employee Related Routes */
const express = require("express");
const router = express.Router();
const mongoose = require("mongoose");
const Employee = require("../models/employee");

router.post("/add", (req, res, next) => {
  const newEmployee = new Employee({
    _id: new mongoose.Types.ObjectId(),
    name: req.body.name,
    age: req.body.age,
    profile_pic: req.body.profile_pic,
    designation: req.body.designation,
    organization: req.body.organization,
    date_of_join: req.body.date_of_join,
    experience: req.body.experience,
    skills: req.body.skills,
  });
  newEmployee
    .save()
    .then((result) => {
      console.log(result);
      if (result) {
        res.status(201).json({
          message: "Created Employee Successfully",
          employee: {
            name: result.name,
            age: result.age,
            profile_pic: result.profile_pic,
            designation: result.designation,
            organization: result.designation,
            date_of_join: result.date_of_join,
            experience: result.experience,
            skills: result.skills,
          },
        });
      } else {
        res.status(404).json({
          message: "No Valid Entry Found",
        });
      }
    })
    .catch((err) => {
      console.log(err);
      res.status(500).json({
        error: err,
      });
    });
});

module.exports = router;
Above we are just using the Router functionality provided by express. We also import the model for the Employee, because we need to tell mongo on what collection we are adding the data to.
In router.post we pass a request and response so that we can fetch the values we give in our body req.body and add it to our Employee model using the new keyword. Here you can see that skills we will directly take from body as an array. We don't need to do anything here specifically for many nested documents.
Now we need to add the routes to the index.js to tell express the route it needs to go to for this resource.
index.js
require("dotenv").config();
const express = require("express");
const cors = require("cors");
const morgan = require("morgan");
const employeeRoute = require("./api/routes/employee");
const mongoose = require("mongoose");
const app = express();

mongoose.connect(
  `${process.env.MONGO_URL}`,
  {
    useNewUrlParser: true,
    useUnifiedTopology: true,
  },
  function (err, client) {
    if (err) {
      console.log(err);
    }
    console.log("connected!!!");
  }
);

app.use(cors());
app.use(morgan("dev"));
app.use(express.json());
app.use("/api/employee", employeeRoute);
app.get("/", (req, res) => {
  res.status(200).json({
    message: "API is Working",
    routes: [{ method: "POST", endpoint: "/api/employee" }],
  });
});

app.listen(9000, () => {
  console.log("Express App Running http://localhost:9000");
});
We will use that resource using the app.use method provided by express. Now for testing let's go to postman and send a request and try it out.
When i send a POST request at http://localhost:9000/api/employee/add with the body like below
{
    "name": "Sid",
    "age": 30,
    "designation": "Dev",
    "organization": "ABC",
    "experience": "0",
    "skills": [{"name": "Javascript"}, {"name": "React"}]
}
I get back a response like this.
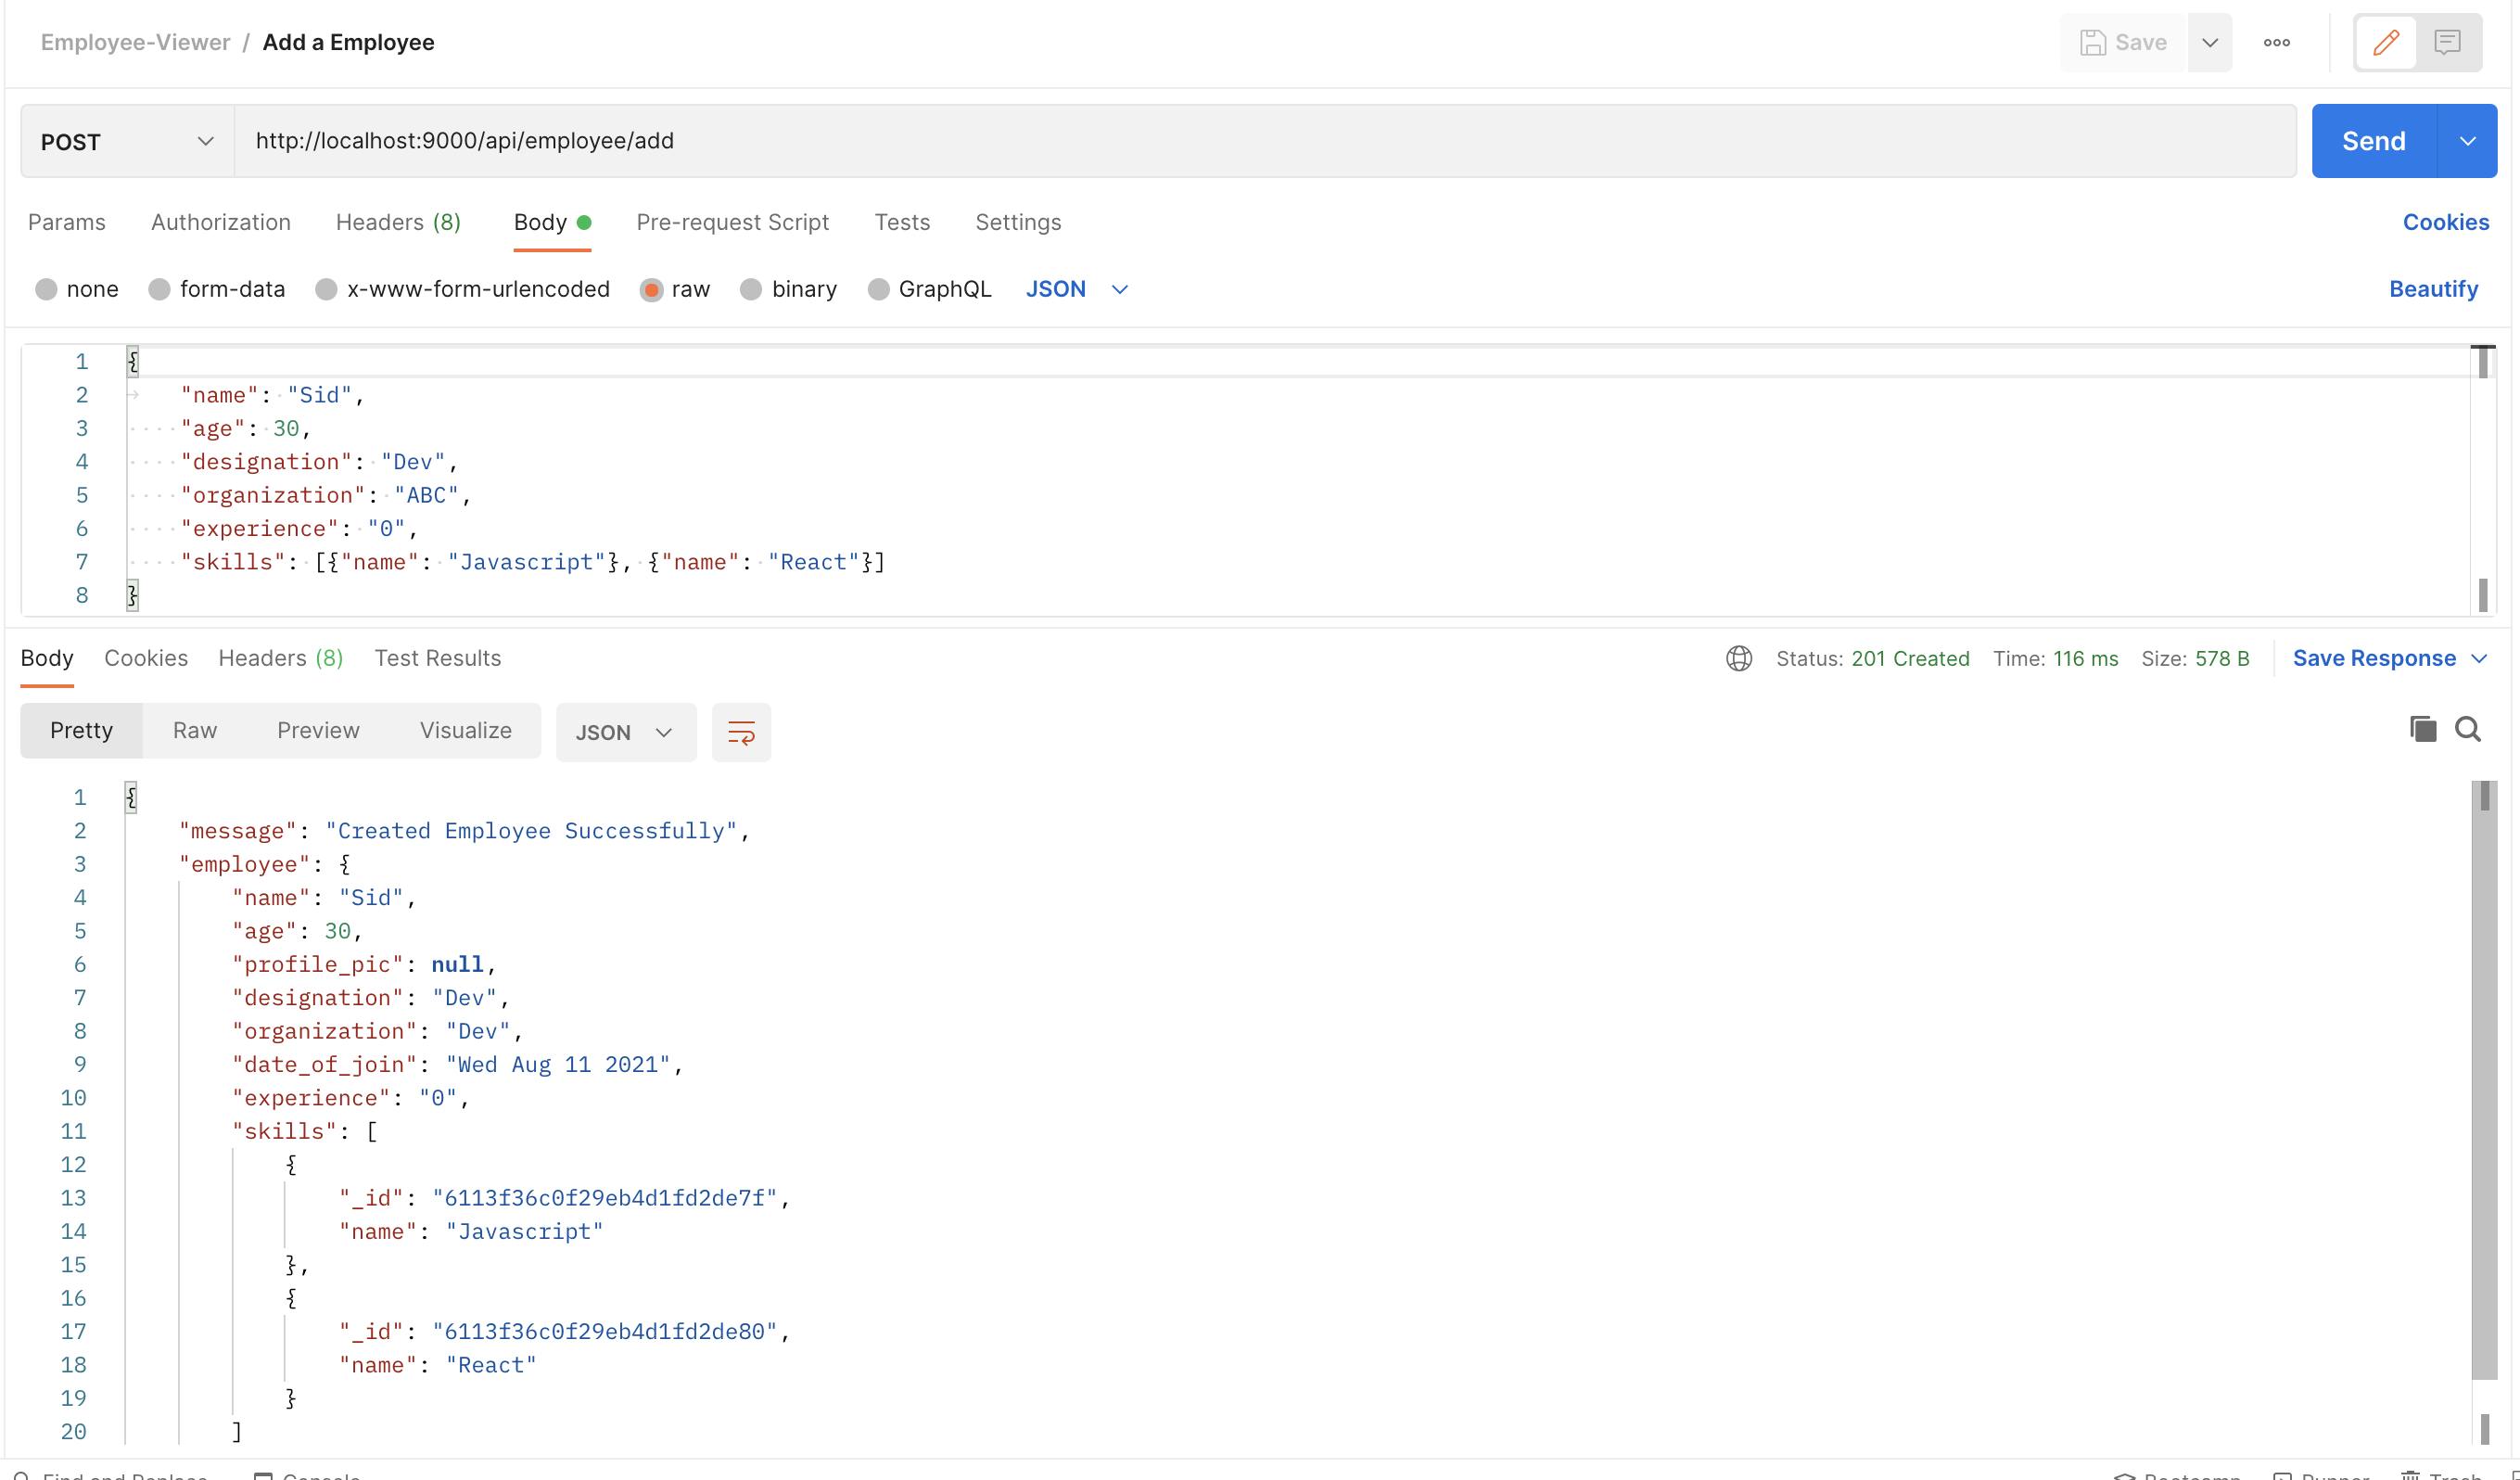
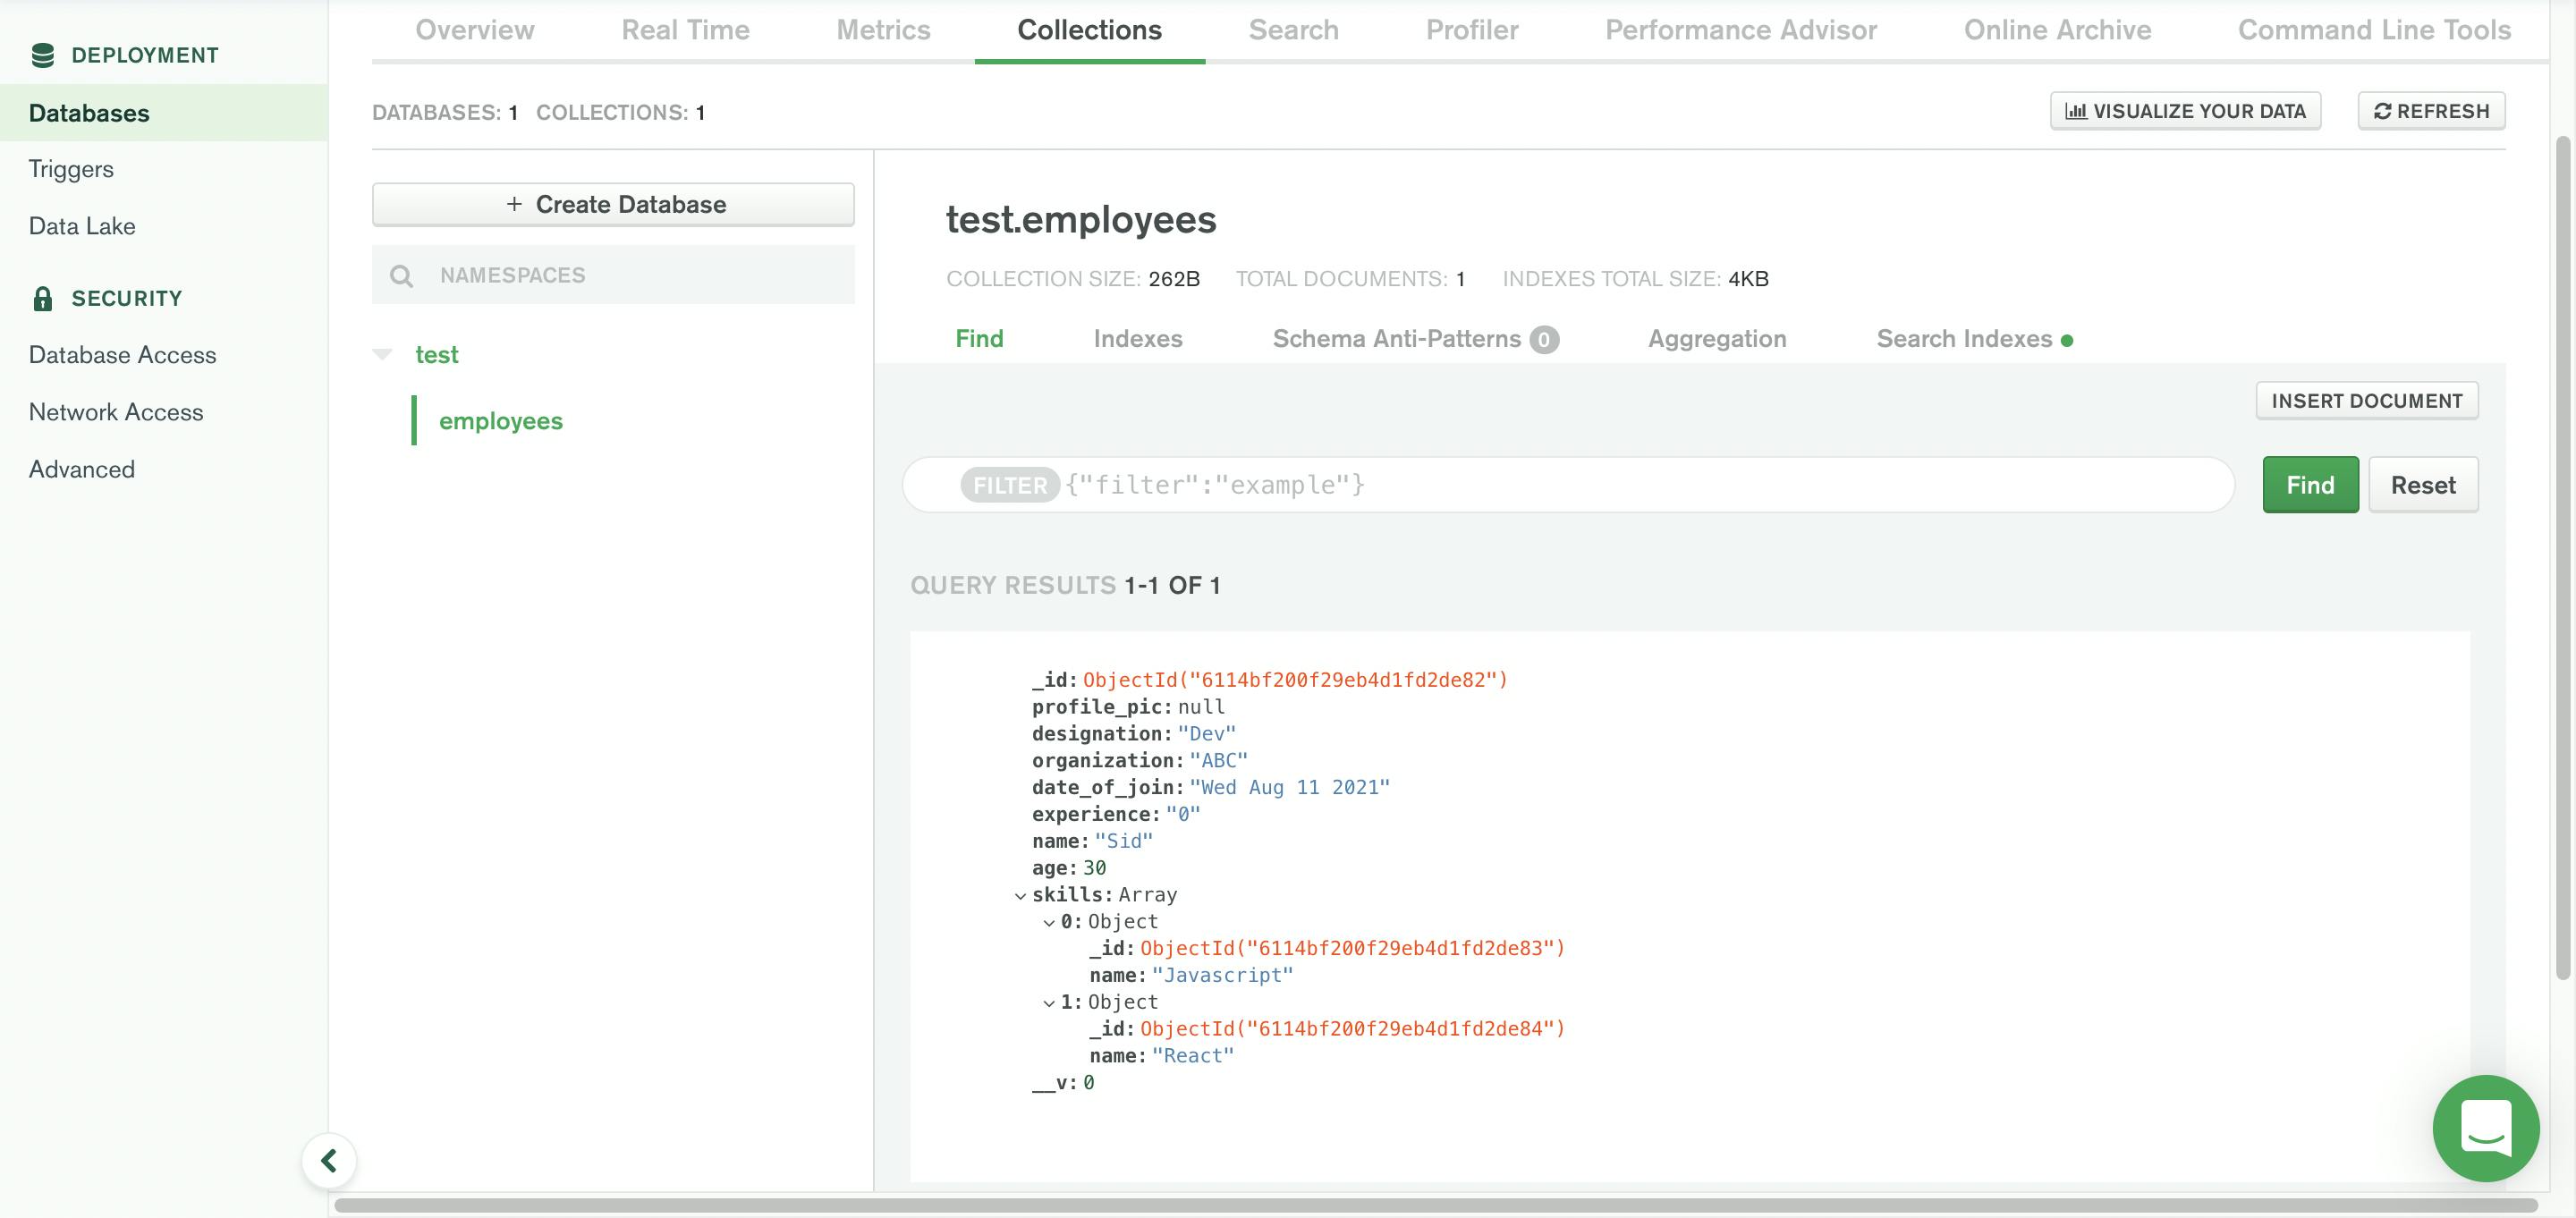
🎊🎊 Yes it works 🎊🎊. You can also view the same data in the Mongo Atlas cloud as well. If you have your account open, go to the dashboard and you can see something like below
This is really good starting point for our api as we are able to create an employee, now we need to add the other routes also. But before that, we will take much more deeper dive into uploading images and using that as the profile picture.
I will be using Azure Blob Storage to upload my images and use that image url in the profile pic. You are free to use any storage service online. Once of the best choices is AWS S3 or Firebase these are more professionally used. But I wanted to just try out Azure. We will see that in the 3rd part of the series.
