Have You Heard Of Klotho ?
"Unleash the power of cloud development with Klotho's modular suite of tools."
Table of contents
- What is Klotho?
- Change architectures in minutes, not weeks
- Swap technologies seamlessly
- Build cloud applications with 4 simple capabilities
- Security at the core
- Turbocharge infrastructure-as-code adoption
- Add to your existing infrastructure
- Your code is the spec
- Use only the tools you need
- Let's Create a REST API using Klotho
What is Klotho?
Klotho is a very awesome platform that makes developers construct AWS / GCP architectures from code. Klotho applies static analysis to create an adaptive architecture based on in-code annotations it introduces.
It also produces the files needed to deploy, run and operate the application in your cloud of choice. From the thoughts of the developers,
Klotho is a platform for making code cloud aware. It expands native programming language constructs with building blocks that capture the developer's intent when targeting cloud and distributed systems. - Klotho Devs

You can find more information on their very simple website, https://klo.dev/
What are some of Klotho's Capabilities(Super Powers)?
Klotho capabilities give your applications cloud powers that are compatible with the same web frameworks, ORMs, database clients and CI/CD stack you already use and love.

Klotho's main capabilities are that you can,
Change architectures in minutes, not weeks
With Klotho, you can modify the architecture of your applications without affecting their underlying logic. In a matter of minutes, you can break down your application into smaller services and seamlessly recombine them later.
Swap technologies seamlessly
You need not be concerned about choosing the ideal cloud technology in advance as Klotho provides flexibility in this regard. Klotho is compatible with a wide range of technologies including but not limited to AWS Lambda, Fargate, Kubernetes, gRPC, Linkerd, and Azure/GCP. With just a single line of configuration modification, you can switch between these technologies, and Klotho will effortlessly adapt your architecture.
Build cloud applications with 4 simple capabilities
If you're familiar with web frameworks, function calls, events, database clients, or ORMS, using Klotho will be a breeze. You can effortlessly expose APIs to the internet, store data in a database, develop event-driven applications using Pubsub, and define service boundaries using Exec Units.
Security at the core
Klotho has an understanding of your cloud dependencies and will apply the principle of least privilege permissions to those dependencies that are interdependent automatically.
Turbocharge infrastructure-as-code adoption
Klotho can produce or revise the infrastructure-as-code that propels your application each time it is executed. By preserving an immutable infrastructure snapshot at every stage, you can securely and reliably roll back to previous stages if needed.
Add to your existing infrastructure
The output generated by Klotho can be easily incorporated into your current infrastructure-as-code and configured similarly. In case you require additional features, simply add custom infrastructure-as-code in the same manner you typically would.
Your code is the spec
Klotho enables the conversion of simple code into cloud-native applications with no extra overhead, specifications, SDKs, or magic servers required. The settings and choices can be centrally overridden and will remain valid over time. We merge compilers, distributed systems, and constraint-based planning to develop the cloud architecture of the future decade.
Use only the tools you need
Klotho is a flexible set of tools that cater to the needs of modern cloud development. You can pick and choose the capabilities that you require. With Klotho, you can develop secure APIs, and event-driven flows, persist data, divide your application into multiple services, and create reproducible environments that are consistent and reliable.
Let's Create a REST API using Klotho
Some prerequisites before we start developing with Klotho.
- You need to have docker installed as that is a much-recommended way to use Klotho, since we are working on architecting our AWS setup.
Install Klotho
Follow the below link if you need more information about the installation, start up docker and then follow the below steps:
docker pull klothoplatform/klotho:latest

alias docker-klotho='docker run --platform linux/amd64 --rm -it -w /usr/src/project -v ${HOME}/.klotho:/root/.klotho -v $(pwd):/usr/src/project klothoplatform/klotho:latest klotho'

alias docker-npm='docker run --platform linux/amd64 --rm -it -w /usr/src/project -v ${HOME}/.npm:/root/.npm -v $(pwd):/usr/src/project klothoplatform/klotho:latest npm'
To set up your Docker environment, pull the latest Klotho image and set up aliases for the tools required by this tutorial by running the following commands in your terminal.
Development
Klotho has a sample repo named js-my-first-app. This contains a basic application which is a starter template to set up a REST API using the API Gateway. Let's download that repo and navigate into the project.
This repo has a very simple setup. You can see an index.js file and package.json as well. Let's open up index.js
const express = require('express');

const app = express();
app.use(express.json());

/* @klotho::persist {
 *   id = "petsByOwner"
 * }
 */
const petsByOwner = new Map();

async function addPetName(req, res) {
  const {pet, owner} = req.body;
  try {
    await petsByOwner.set(owner, pet);
    res.send(`Added ${pet} as ${owner}'s pet`);
  } catch (error) {
    res.status(500).json({message: error.message});
  }
}


async function getAllPets(req, res) {
  try {
    res.json(Object.fromEntries(await petsByOwner.entries()));
  } catch (error) {
    res.status(500).json({message: error.message});
  }
}

app.get('/pets', getAllPets);
app.post('/pets', addPetName);

/*
 * @klotho::expose {
 *  id = "pet-api"
 *  target = "public"
 *  description = "Exposes the Pet API to the internet"
 * }
 */
app.listen(3000, () => console.log('App listening locally on: 3000'));
The above code is a very simple express app, that has a /pets endpoint with GET and POST methods.
Below is a few Annotation that Klotho uses, like persist and expose.
/* @klotho::persist {
 *   id = "petsByOwner"
 * }
 */
The above is the Klotho way of saying let's persist this data, they have different AWS services to persist data. Here it refers to a Dynamo DB. If you want to know more about this checkout the link -> know more
/*
 * @klotho::expose {
 *  id = "pet-api"
 *  target = "public"
 *  description = "Exposes the Pet API to the internet"
 * }
 */
In the above snippet, Klotho is exposing a particular endpoint to be accessed by everyone, basically like an AWS API Gateway, by `expose` you can say is a way for a User to consume the API.
Next, Navigate into your project directory, then in that type the following command.
docker-klotho --login local
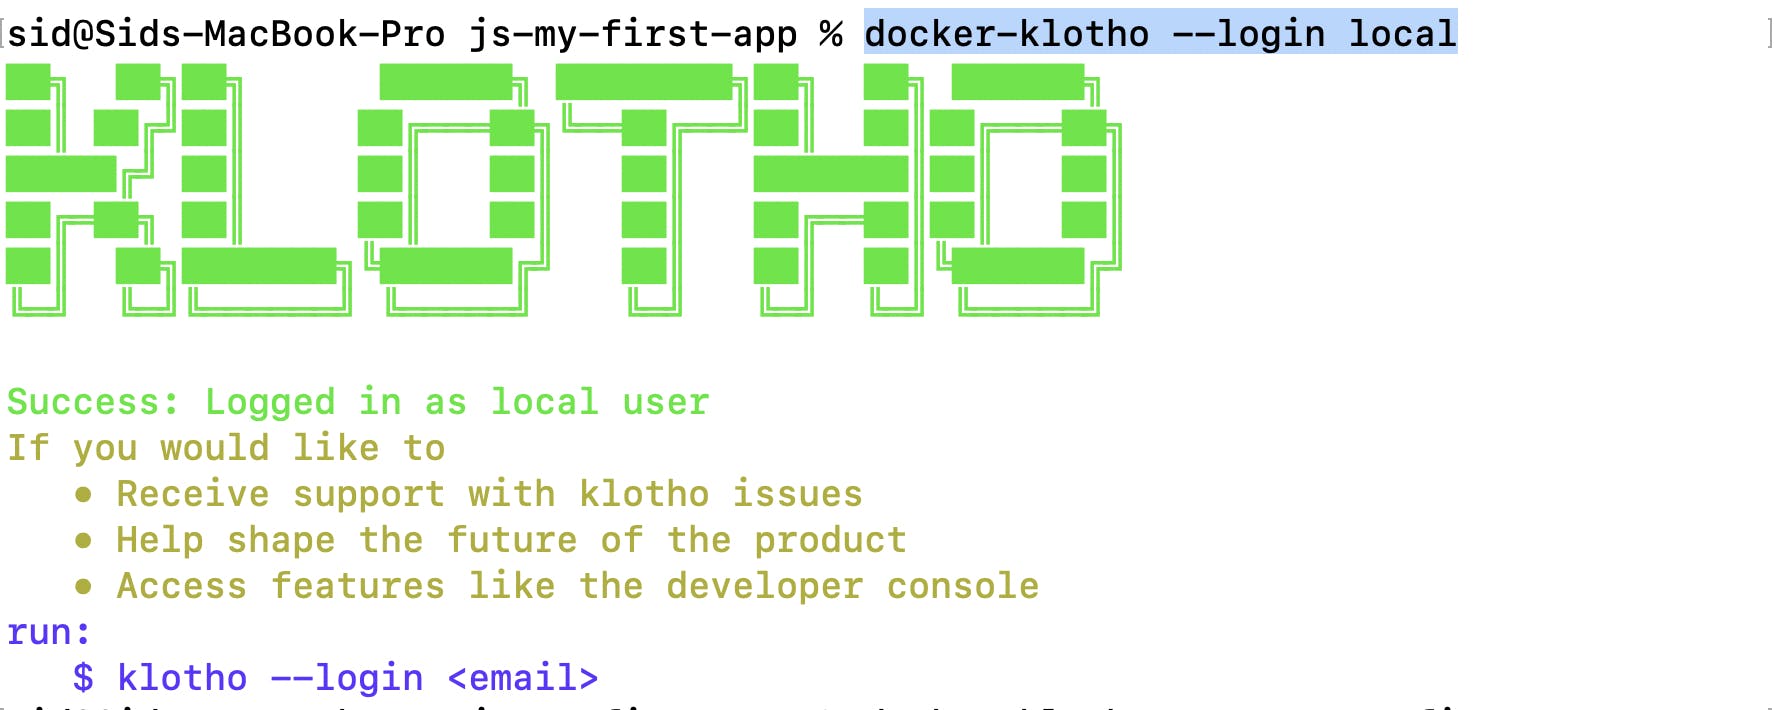
docker-klotho . --app my-first-app --provider aws
Next, run this command and the resources will be built to be deployed in AWS.
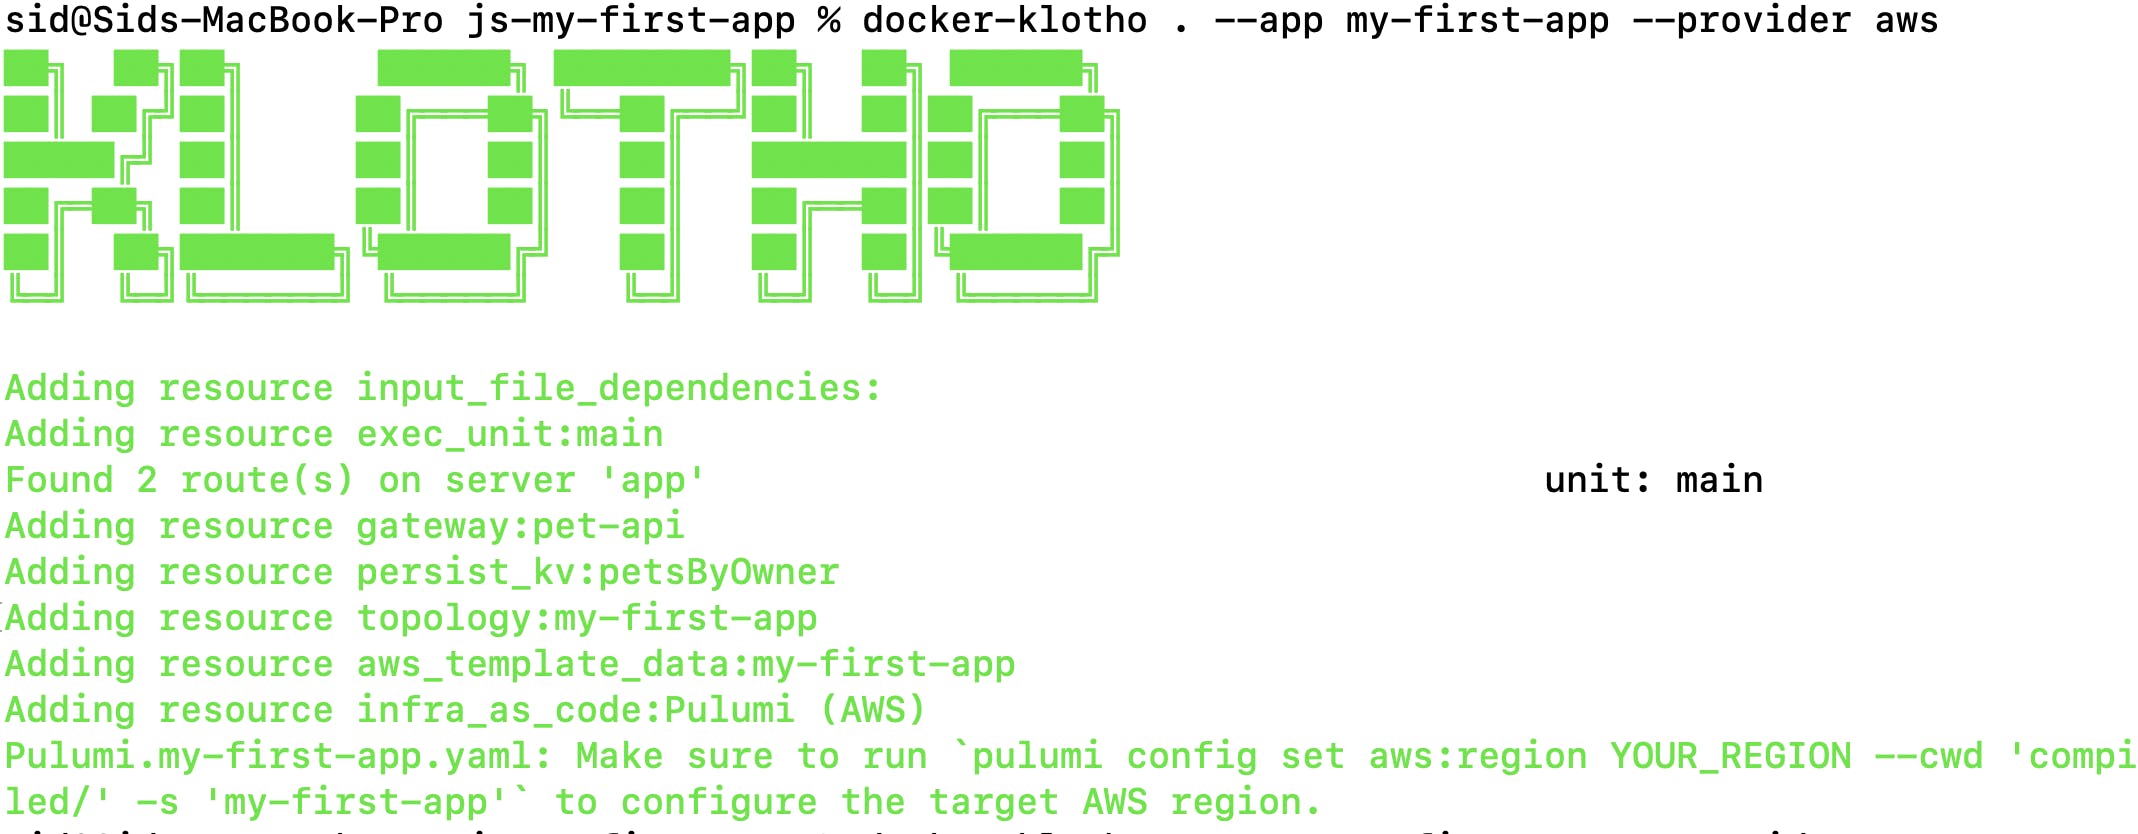
The above screen shows the way klotho creates the environment for us.
If you navigate into your folder, you can see, the folder structure as follows:
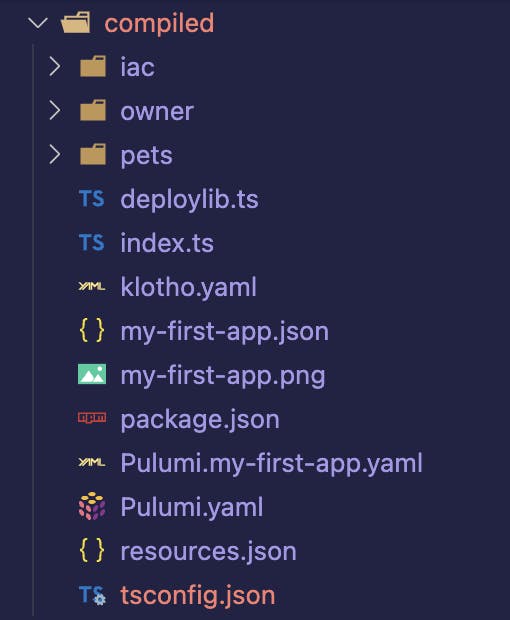
This is nothing but files that Klotho uses when you will deploy your architecture to the AWS cloud.
It also has an amazing feature, it can generate architecture diagrams for you. Is it Awesome 😎 ? Look into your compiled folder, you will find a png image.
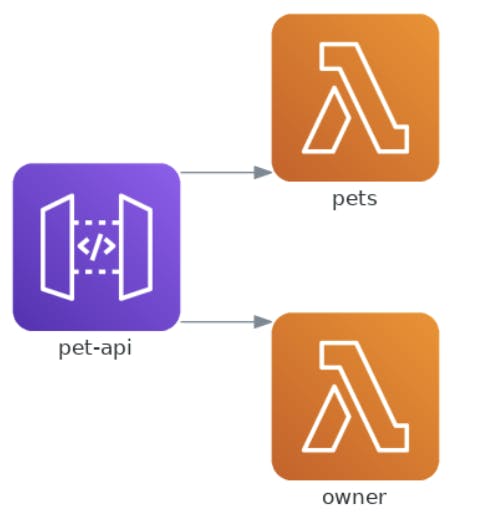
Your diagram may look different than this because I created multiple router endpoints. Basically in AWS terms, we will use a different lambda to handle the different routes. I have added /pets and /owner routes so that I can show you a better example and play with Klotho and see its awesome capabilities.
index.js
const express = require("express");
const ownerRouter = require("./owner");
const petsRouter = require("./pets");
const app = express();
app.use(express.json());

app.use("/pets", petsRouter);
app.use("/owner", ownerRouter);

/*
 * @klotho::expose {
 *  id = "pet-api"
 *  target = "public"
 *  description = "Exposes the Pet API to the internet"
 * }
 */
app.listen(3000, () => console.log("App listening locally on: 3000"));
Let's create pets.js and owner.js files to create multiple routes for each.
owner.js
/**
 * @klotho::execution_unit {
 *   id = "owner"
 * }
 */
const router = require("express").Router();

async function getPetFromOwner(req, res) {
    try {
        const id = req.params.id;
        res.json(await petsByOwner.get(id));
    } catch (error) {
        res.status(500).json({ message: error.message });
    }
}
router.get("/:id", getPetFromOwner);

module.exports = router;
pets.js
/**
 * @klotho::execution_unit {
 *   id = "pets"
 * }
 */
/* @klotho::persist {
 *   id = "petsByOwner"
 * }
 */
const router = require("express").Router();

const petsByOwner = new Map();

async function addPetName(req, res) {
    const { pet, owner } = req.body;
    try {
        await petsByOwner.set(owner, pet);
        res.send(`Added ${pet} as ${owner}'s pet`);
    } catch (error) {
        res.status(500).json({ message: error.message });
    }
}

async function getAllPets(req, res) {
    try {
        res.json(Object.fromEntries(await petsByOwner.entries()));
    } catch (error) {
        res.status(500).json({ message: error.message });
    }
}

router.post("/", addPetName);
router.get("/", getAllPets);

module.exports = router;
Now if you would run the same command for docker,
docker-klotho . --app my-first-app --provider aws
Your architecture will be created and you will be able to see the diagram as mine.
Klotho has a deployment step as well if you are interested please check out the Klotho website.
Conclusion
In this blog, we saw various features of Klotho, thanks to the developers of klotho and awesome work to make AWS architecture an easier step. We do have other features coming up from Klotho like setting up architecture in GCP and other clouds.

