

How to create a Virtual Machine in Azure ?

I am a Full stack developer who is obsessed with React, I like to explore cloud technologies like AWS and use the services to create various apps as hobby projects.
Microsoft Azure has been in the cloud service provider market for a very long time. Its cloud services are really good and they have tons of different services that they provide. Today I will be writing about on how to create a Virtual Machine in Azure.
If you are familiar with AWS then we can say that, Virtual Machine in Azure is equivalent to EC2 Instances in AWS as both of them are mainly focused on Compute.
First you need to create an account in Azure and that should not take a long time. Its pretty straightforward to create an account with Azure. Once you have created an account login into the portal and you will see a dashboard.
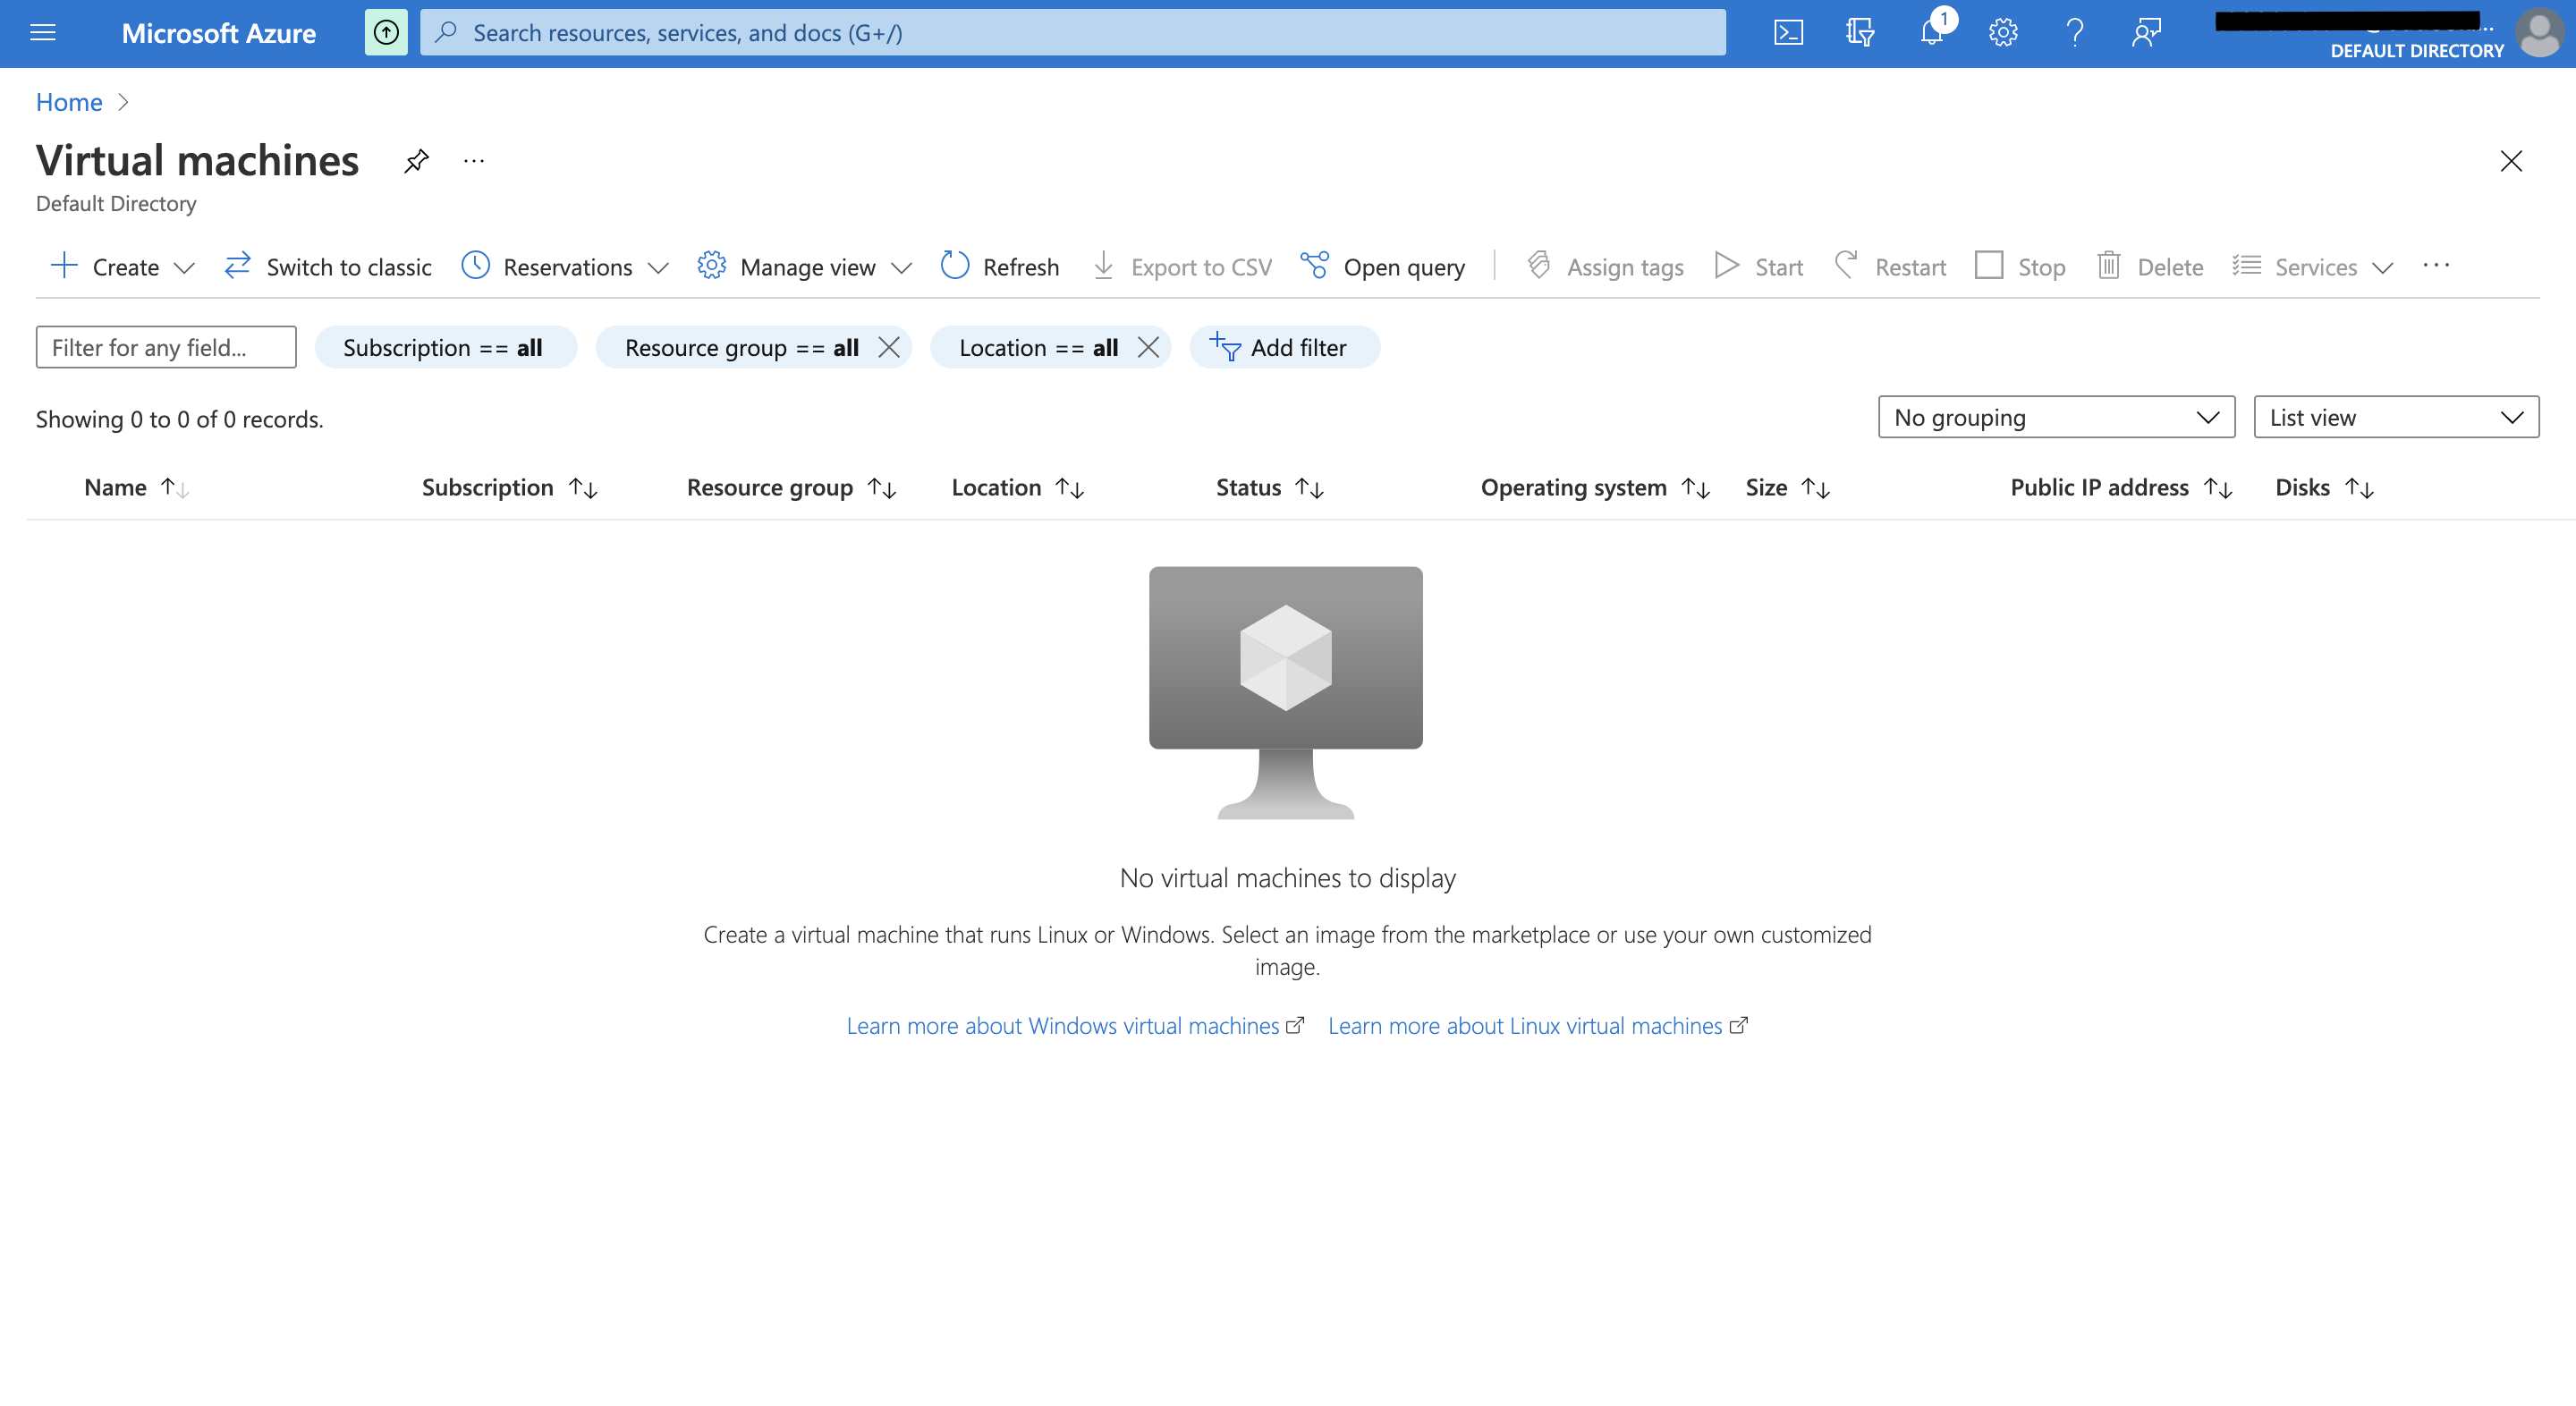
Select Virtual Machines and you will be able navigated to that page. Once navigated you will see something like this:
Click on Create, where it will ask 2 options:
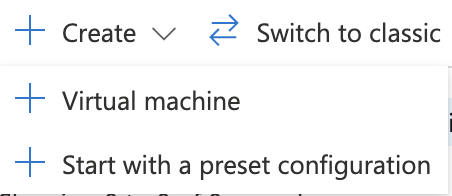
Click on Virtual Machine. It will open this panel like below:
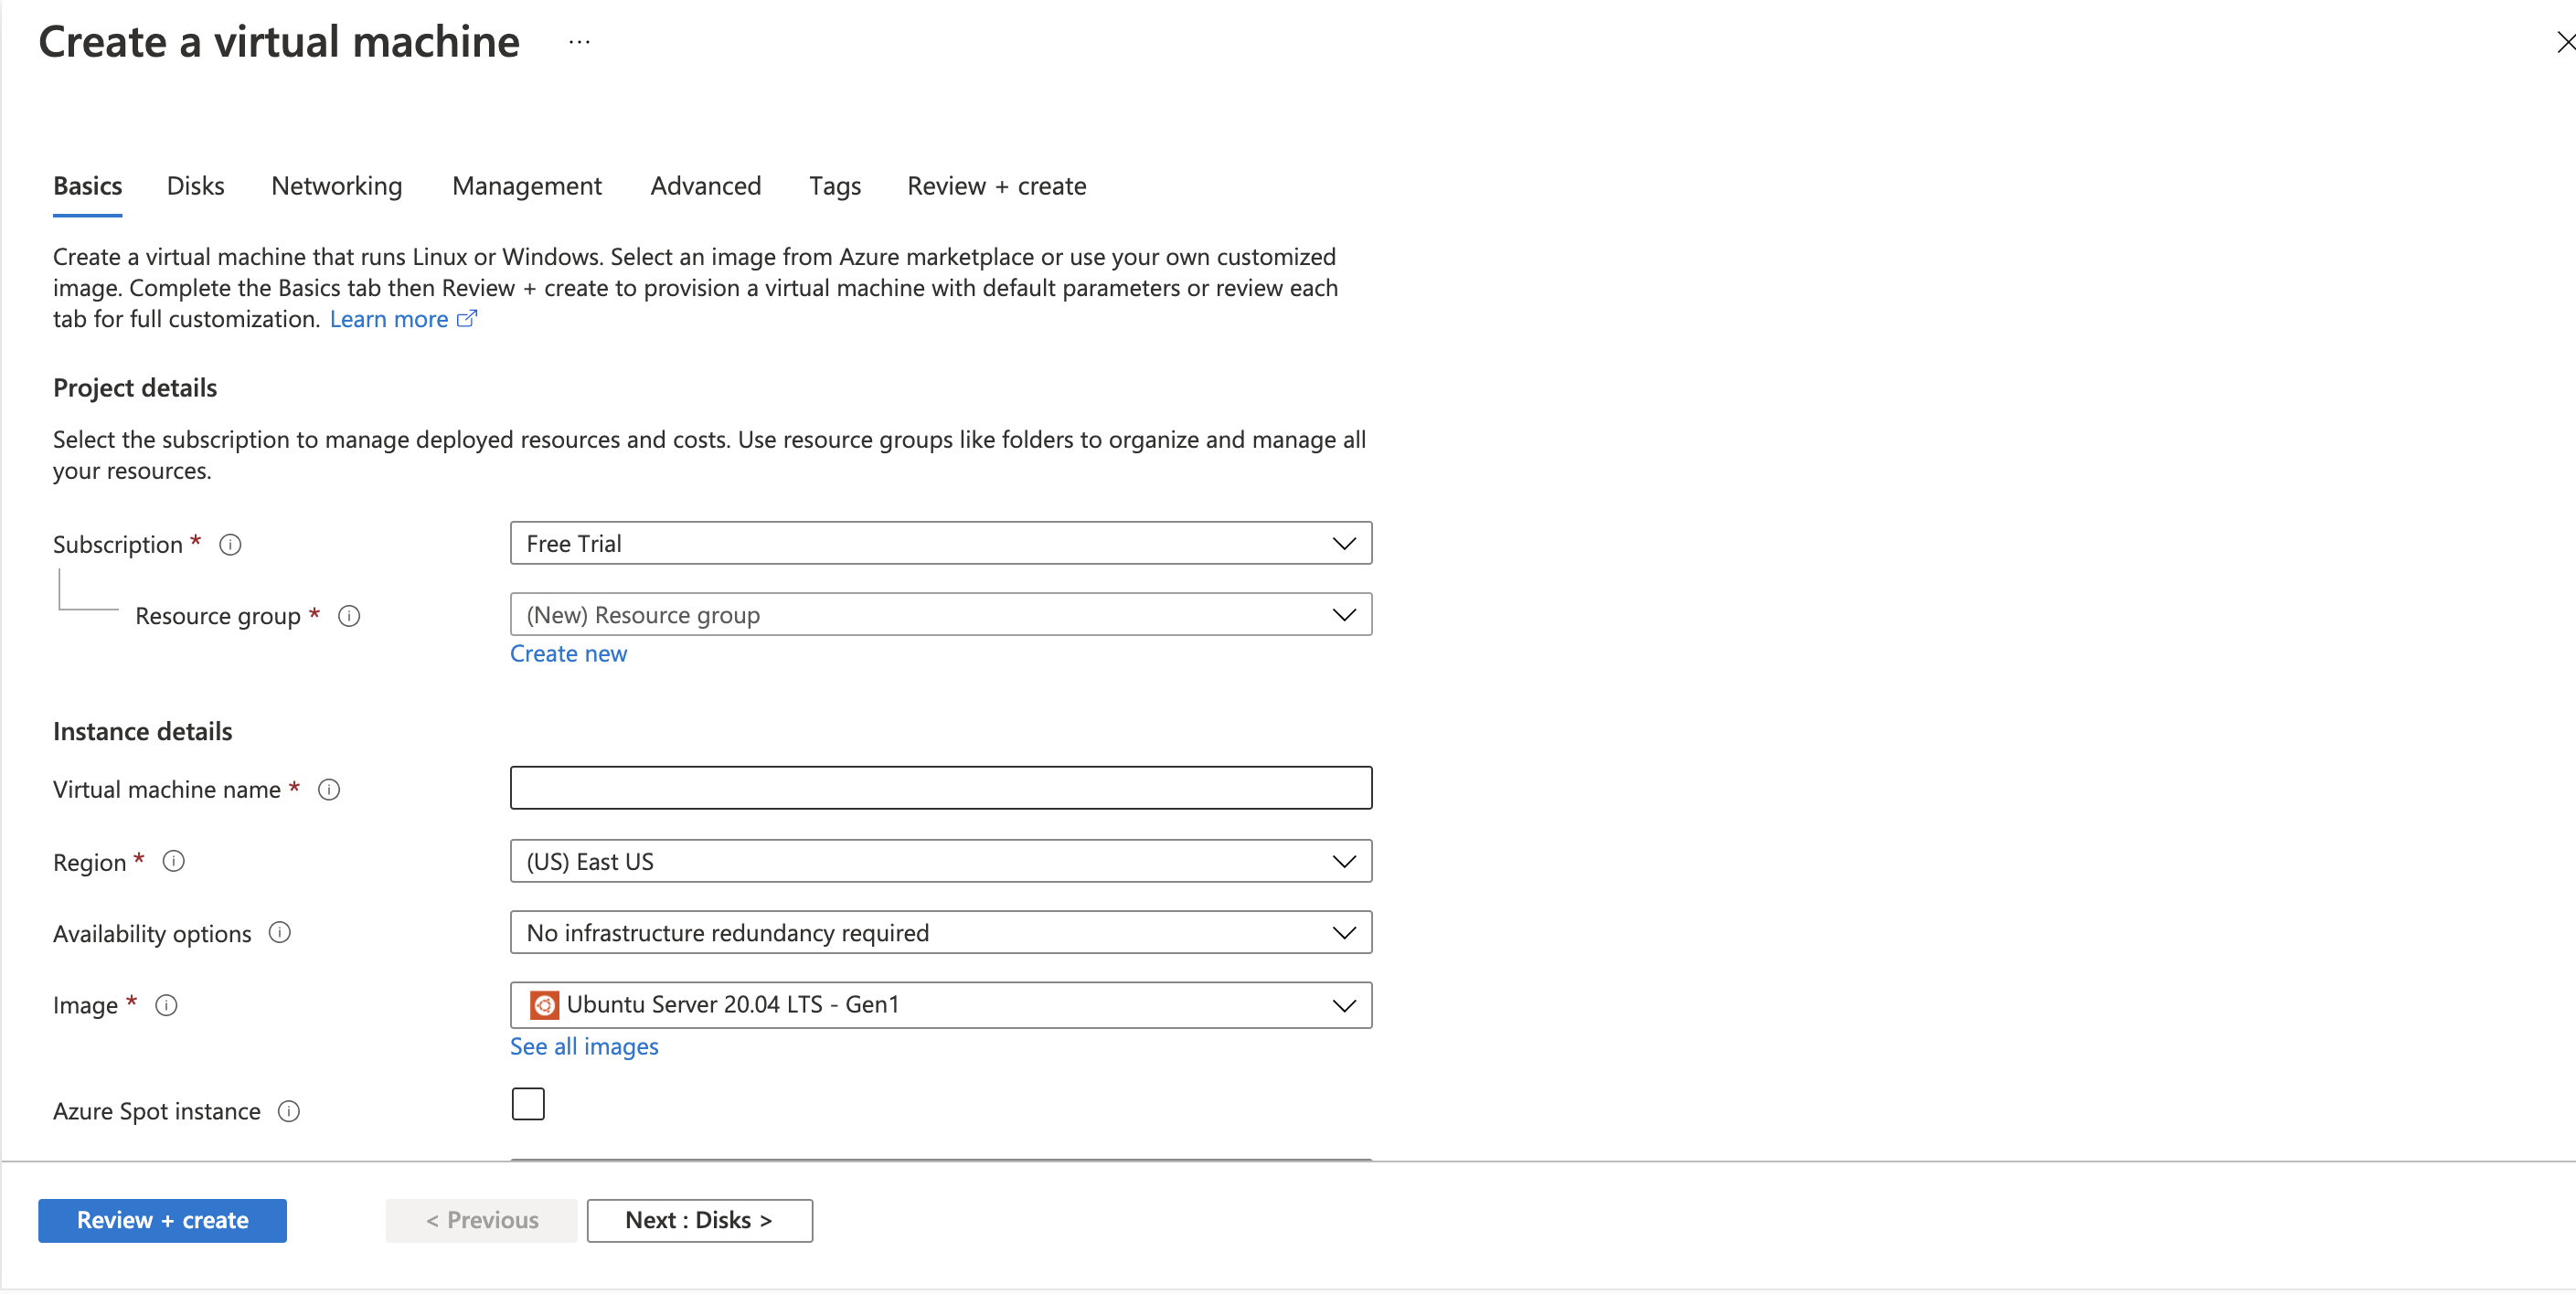
Let's Break down each field that is shown above:
- Subscription - For Billing Purposes. All the resources in the same subscription is billed together.
- Resource group - All Resources together make a resource group. We can have many resource groups under one subscription. This is mainly used when there is large team, we can assign the resources used in particular team to one group and then they can billed separately if needed.
- Virtual Machine name - Name of the virtual machine. Can be anything the user wants. Notice that if you leave the Resource group blank and then start to type a Virtual Machine name it uses the same for the resource group. If you dont want that to happen. We need to create a Resource group then add that resource to that resource group. It is best to have a resource group created because, if we want to delete or terminate a service, we can directly delete the resource group and all the resource in that group gets terminated. Its a pretty neat trick.
- Region - A Location you want the server to run from. Its recommended by Azure to keep the region closest to your customers. Also when selecting the region. You need to be aware that not all resources are available in all Regions.
- Availability Options - Azure recommends to keep multiple VM's running in multiple Availability Zones. An Availability Zone is a location within a region where a Azure services are present. This is because if one AZ's fail you will always have a backup from another region. This decreases interruptions when accessing resources.
- Image - A base image the server needs to run. There are many images to choose from. You can click
see more imagesto view all different available instances. - Azure spot instances - This feature is available in most of the CSP(Cloud Service Providers). These are VM's that share unused azure capacity for compute. There is very less charge for this type of instance. Note that these instances can be interrupted by Azure anytime. Therefore must not be used to non-interruptive processes. It can be used for background jobs or cron jobs which can be interrupted and not incur any loss to customers.
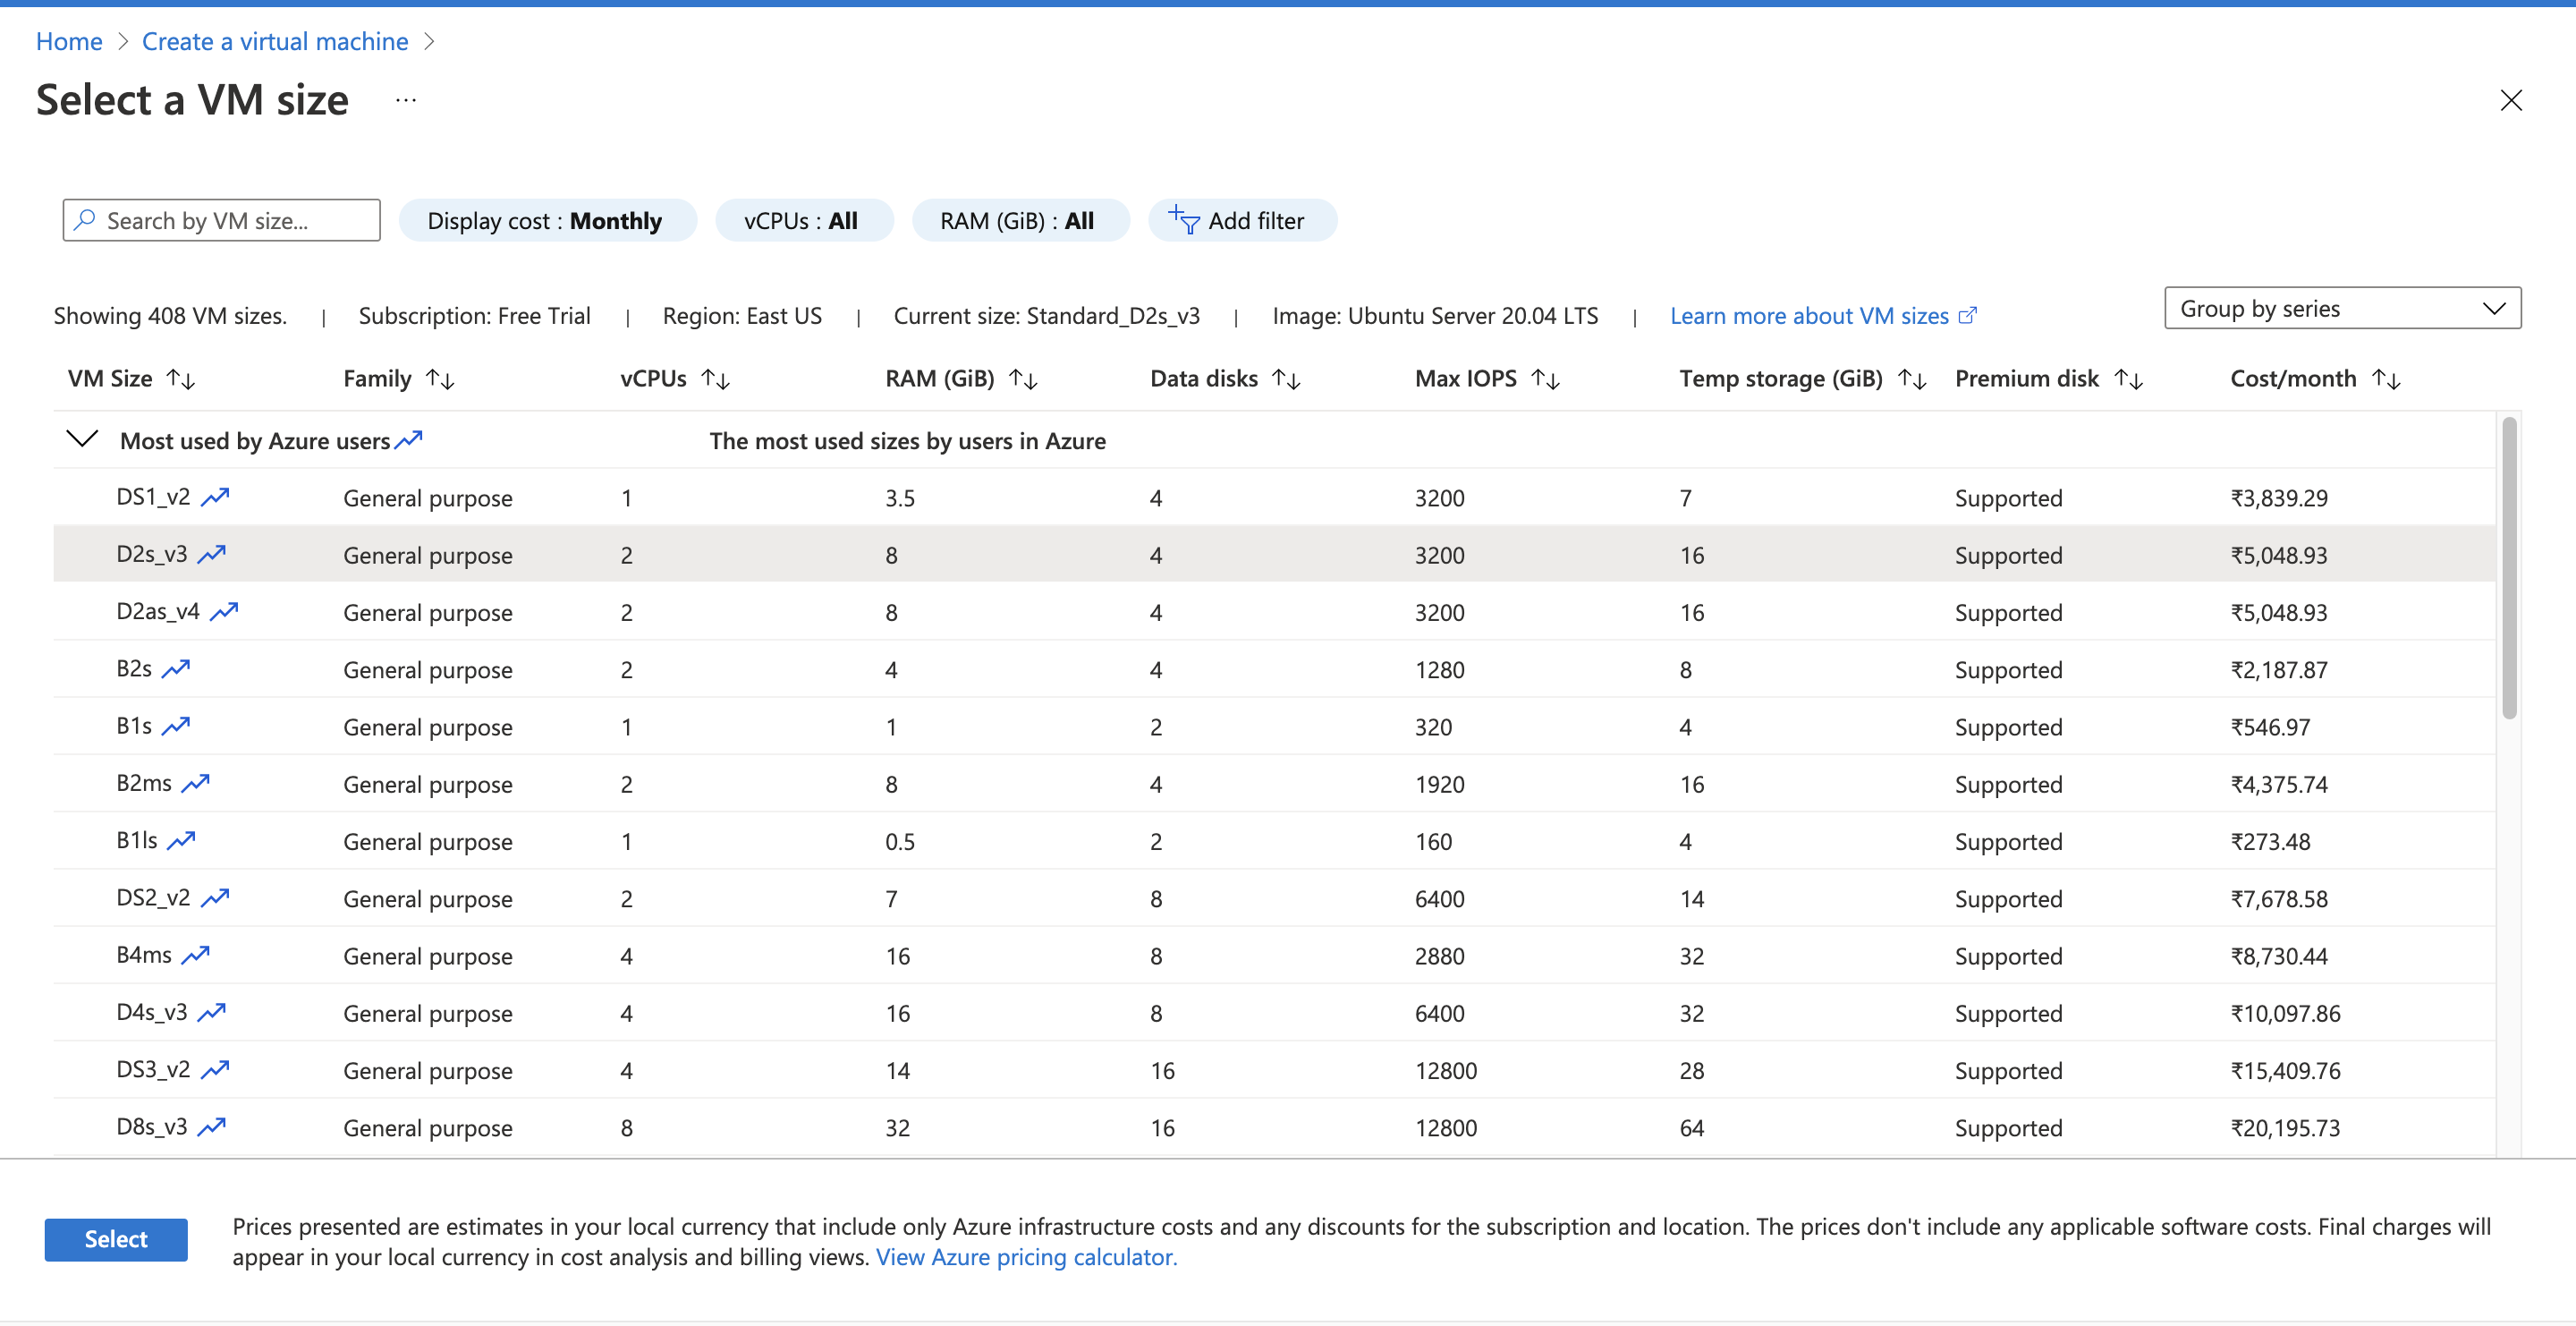
- Size - The VM's capacity size. You must choose capacity based on what type of process that needs to run on these VM's.
As you can see below - the type of process is directly affecting the price. So this must be selected carefully. Keeping it default at lowest price available to avoid incurring extra charges.
- The administration access section is self explanatory. Authentication type - this section is to do with the SSH / Username and password access for the Azure VM's. When connecting to the Azure VM it will ask for the SSH key pair file. You can generate that using the
SSH public key sourceand selectgenerate new key pair. Then if you want you can change the name of the key pair. - Lastly, Inbound port rules - are pretty important as they are the gateway through which you can connect to the VM. Anyone will be able to access this VM if you allow SSH(22). This is risky if you are in production application. Therefore, you need to use this only while testing.
You can click to Go to Next Section - Disks
Disks you can choose the type of Disk you need for the VM. In the os disk type you will find 3 options:
- Premium SSD - High Workloads
- Standard SSD - Standard Workloads
- Standard HDD - For Backups
SSE encryption type - choose to encrypt the disk at rest the key is managed by Azure. You can also encrypt with a customer managed key and for more security you can always double encryption like a physical lockers in banks. But to store Customer managed keys you need to store it in a Key vault which does incur charges so you need to be aware of that as well.
You can click to Go to Next Section - Networking
In Networking,
We can define network connectivity for your virtual machine by configuring network interface card (NIC) settings. You can control ports, inbound and outbound connectivity with security group rules, or place behind an existing load balancing solution.
Network Interface
- Virtual Network - To keep the VM's virtually isolated from public access.
- Subnet - IP address ranges that can be used to keep the VM's isolated
- Public IP - Setup if you want to communicate to the VM from public
NIC network security group - A security feature to allow/deny inbound/outbound traffic.
Load Balancing Solution - Can use a load balancing solution to manage traffic to the VM's.
You can click on Tags at the tab bar and it will take you to the Tags sections where we can add tags to the resource so that we can keep track of the resources when billing. Its a way to categorize resources which helps in billing when we have a lot of resources in the account.
Now click on Review + click which gives us a whole review of all the options we have selected it also gives a pricing based on the options we have chosen. Once your validation passes you can click create and the VM is created.
Now we have successfully created a VM in azure.


